Category: Uncategorized
As a company, we take our corporate social responsibility to our customers, our partners and ourselves – extremely seriously. It’s very much a part of our culture. We are always seeking ways to lessen our footprint and reducing carbon emissions. It’s all part of our commitment to global environmental sustainability.
To coincide with the relaunch, we are proud to announce that with every box produced we will be supporting the World Land Trust and the fantastic work they do to protect threatened habitats and wildlife. All of our cardboard boxes are being made using carbon balanced carton.
Qualvis Print & Packaging who we work with are thrilled to be one of just a handful of certified Carbon Balanced Printers in the UK.
What are carbon balanced cartons?
Carbon Balanced Cartons are the highest statement of integrity for users and producers of paper packaging.
Alongside the use of Carbon Balanced Board, these cartons are produced by a Carbon Balanced Printer – a printer that has measured and balanced the annual impacts of its fossil fuel usage, transportation and electricity consumption.
These impacts are third-party verified, and balanced with international conservation charity World Land Trust (WLT).
WLT offsets these emissions by protecting threatened habitats that would otherwise have been lost, avoiding the release of stored carbon. This also enables the regeneration of degraded habitats, which gradually re-absorb atmospheric CO2.
About World Land Trust
World Land Trust is an international conservation charity that protects the world’s most biologically significant and threatened habitats acre by acre.
Since its foundation in 1989, WLT has funded partner organisations around the world to create reserves and give permanent protection to habitats and wildlife. To date, WLT has helped secure more than 881,000 acres of threatened habitat in 20 countries.
WLT’s patrons include Sir David Attenborough OM CH FRS, Steve Backshall MBE, David Gower OBE & Chris Packham CBE.
The money that is given to the World Land Trust, in my estimation, has more effect on the wild world than almost anything I can think of.
Sir David Attenborough, WLT Patron
Want to find out more? Please email us on info@maldonsalt.co.uk and keep up to date via social media @maldonsalt
PREPRATION:
- Wash the potatoes in cold water and wrap each potato tightly in tinfoil.
- Peel and wrap the onions in foil, add a little butter, crushed garlic, and a dash of balsamic vinegar before wrapping them up.
- Add the wrapped potatoes and onions directly on the coals, towards the edge of the fire, and then position the odd coal around and on top of them. After 30 minutes, move the onions away from the heat and keep warm on the edge. The potatoes should be done after approximately 50 minutes. You will know when they are done as you’ll be able to easily pierce them with a knife.
- Once the potatoes and onions are cooked, remove from the fire and shake off any ash.
- Cut a cross into the top of each potato through the tinfoil using a large knife. Use your thumbs and forefingers to press open each potato from all four sides so that the potato opens like a flower.
- Unwrap the onions and the potatoes, sprinkle with Maldon Salt, and spoon over the mushroom sauce.
MUSHROOM SAUCE PREP:
- Fry the chopped mushrooms in the oil until soft.
- In a pot, add the cream, season generously with Weber Flame Grilled Vegetable Spice, and bring to the boil.
- Beat the egg and then add about half a cup of the warm cream-and-mushroom mix to the egg, stirring continuously.
- Add the egg mixture into the rest of the mushroom cream in the pot.
- Stir in the cream cheese until everything is combined, heat until it simmers.
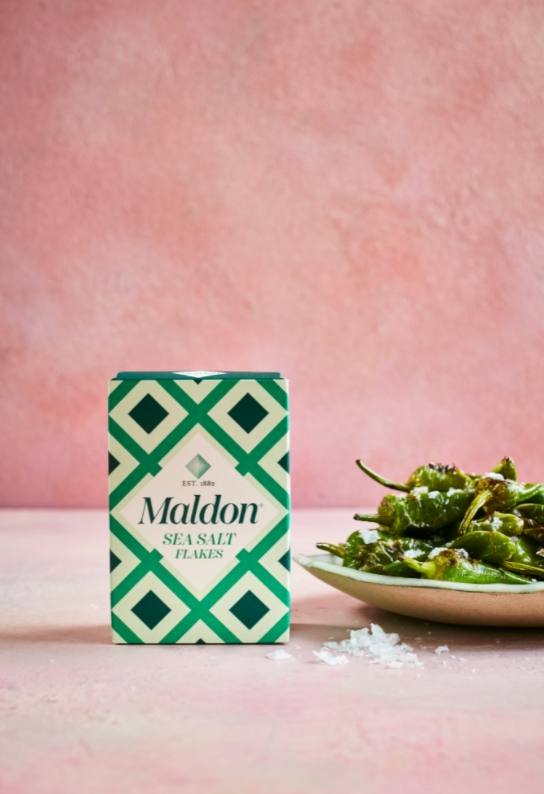
We’ve been hand-harvesting our famous pyramid-shaped flakes, using the same time honoured techniques for four generations. During that time our flakes have remained
constant, though the packaging it sits in has evolved over the years.
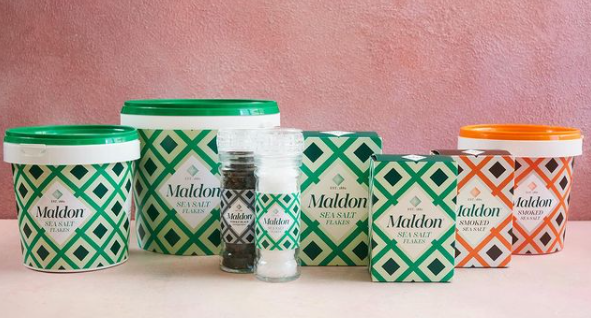
We’re excited to be able to reveal to you our new look and feel, designed to be pride of place on your kitchen counter!
The Osborne family are the custodians of this ancient culinary tradition and creators of what is now a globally recognised brand, loved by chefs the world over.
Steve Osborne, our Managing Director, speaking about the packaging evolution said: “Heritage is important to us, so the new packaging design had to respect our past whilst also embrace the future. The striking new look and feel will ensure we stand out on shelf, inspire new audiences and retain pride of place on dining tables across the globe.”
We’ve found that many home cooks acknowledge that they have more to learn about
seasoning; people want to understand different salt types and are not sure which salt goes best with which ingredients. Lockdown has also inspired and enabled many of us to
develop our cooking skills. We want to encourage you to expand your seasoning knowledge, inspire you to create extraordinary dishes and seize the seasoning using Maldon Salt!
To coincide with the relaunch, we are proud to announce that with every box produced we will be supporting the World Land Trust and the fantastic work they do to protect
threatened habitats and wildlife. All of our cardboard boxes are being made using carbon balanced carton.
Our new packaging was created with award-winning agency Big Fish, Perry Haydn
Taylor, Creative Director, Big Fish says: “The aim of this new design was to bring it into
everyday lives and get people to season their food more. And, to ‘Seize the Seasoning’ you need to be able to ’see’ the seasoning, so we hope that the new louder and prouder packaging will do just that. Making the brand more accessible and something that people will proudly display on their kitchen tables will certainly help to increase usage too.”
Make sure to keep an eye out in your local store in the coming weeks and it will be rolling out in countries around the world in coming months.
Seize the seasoning! Tag us on social media with your new packs and recipe creations!
Want to find out more? Please email us on info@maldonsalt.co.uk and keep up to date via social media @maldonsalt
In a large bowl add the padron peppers and then drizzle over the olive oil. Toss the peppers so they are well coated in the oil.
Heat up a frying or griddle pan to a medium high heat. Once hot, fry the peppers for a few minutes on each side until they get black char marks and soften.
Once cooked place the padron peppers onto a serving plate and sprinkle generously with Maldon salt before serving.
Preheat the oven to 150C.
Start by prepping the pork. Roughly chop the pork into 1-inch chunks. In a large bowl mix together the fennel seeds, chilli flakes, ground cumin, orange juice and zest, tomato puree, chipotle paste, garlic cloves and salt to make a paste. Add the pork chunks to the paste and toss them so they are well coated in the spices.
In a large heavy bottom casserole pan, heat 1 tbsp olive oil. Add the pork and fry them off on all sides so they are golden brown, and the fat has rendered down – you might need to do this in batches. Once browned, remove with a slotted spoon. Keeping the pan on the heat, deglaze all the sticky bits that have stuck to the bottom of the pan, using 2 tbsp water and 2 tbsp honey. Let this bubble and scrape the bottom of the pan with a wooden spoon to lift it.
Then add the browned pork back into the casserole dish. Fill the pan with the vegetable stock, it should come up about halfway up the meat but if you need more then top up with water. Place the lid on the casserole and put it into the preheated oven for 2 hours.
While the pork is cooking prepare the pickled onions. Finely slice the onions and place into a small bowl. In a pan heat up the vinegar, sugar and Maldon salt. Heat it gently until the sugar and salt has dissolved, then pour the warm liquid over the sliced onions. Toss the onions and then allow them to sit. They will collapse and soften, turning a wonderful pink colour.
After 2 hours, check the pork. Remove the pan from the oven and using two forks, start to pull the meat apart – some parts will still be a little tough. Once you have pulled as much as you can, place the lid back onto the pan and put it back in the oven for a further hour.
Just before the meat is ready it is time to prepare the rest of the taco elements. In a small bowl mix together the natural yoghurt and chipotle paste. Destone the avocados and slice, then squeeze some lime over them to stop them from oxidising. In a small frying pan, heat up the tacos for a couple of minutes on both sides.
After 3 hours remove the pork from the oven. It should be meltingly soft by now and easy to pull apart with your forks.
Serve the tacos with a dollop of the chipotle yoghurt, some pulled pork, avocado slices, pickled red onions and some coriander leaves. Squeeze over some lime juice and a final pinch of Maldon salt, then enjoy!
The classic Caprese salad originates from Italy, which is made of sliced fresh mozzarella, tomatoes, basil and seasoned generously with salt and olive oil. What is interesting with this dish is that, like the Margherita Pizza, the colours of the food resemble the Italian flag of green, red and white.
There are many variations to a Caprese salad, including a pesto dressing instead of olive oil, or even using balsamic vinegar. You can also substitute the olive oil for a delicious vinaigrette with tarragon to really make the tomatoes sing in flavour.
- To prepare the caprese salad, slice the tomatoes and arrange on a large platter.
- Tear the mozzarella and arrange this around the tomatoes.
- Drizzle over some extra virgin olive oil and season well with Maldon Salt and cracked black pepper.
- Finally garnish with some fresh basil leaves and then serve!
What to serve with Caprese Salad?
A Caprese salad is typically served as a side or appetizer, although it can be enjoyed as a lighter lunch/dinner option. However, you can serve many things with a Caprese salad to elevate the dish even further.
Grilled vegetables pair well with the salad to give texture and a gentle smoky flavour. Try peppers, eggplant or perhaps delicious charred courgettes, topped with tarragon dill and basil.
Additionally, adding a protein like chicken, shrimp, or steak make great additions to the dish to make a heartier main course option.
Our favourite is adding starch to the dish! Adding some crusty bread or pasta will transform the dish to have texture, whilst also having something to soak up the dressing. By adding your favourite pasta, you are essentially making a delicious pasta salad that can be enjoyed with friends and family.
What other cheeses could work in this recipe?
Instead of using the classic Mozzarella cheese in a Caprese salad, burrata cheese in a fantastic substitute due to it’s molten middle of cream. If you are using burrata, make sure to layer the tomatoes and basil first on the dish, and then place the ball of burrata on top…buon appetito!
What are the best tomatoes to use for a Caprese Salad?
The most used tomatoes for a Caprese salad are heirloom tomatoes, due to their balanced flavour in being sweet and hearty. You can also use fresh cherry tomatoes or even vine tomatoes. If you want something more substantial, try using beefsteak tomatoes in the mix to bulk up the salad.
How to present a Caprese salad?
Start of by using a large serving plate or platter as the base for the salad. The bigger the plate, the more room it will allow you to showcase the beautiful red, white and green colours of the food.
You need to arrange the tomatoes and mozzarella on the platter in an alternating pattern. After you have laid these ingredients down, you can then scatter the basil leaves over the tomatoes and mozzarella.
After this, season generously with Maldon Salt and cracked black pepper to elevate the sweetness of the tomatoes and counteract the bitterness of the basil.
With a final glug of olive oil, you are able to serve immediately with a serving spoon.
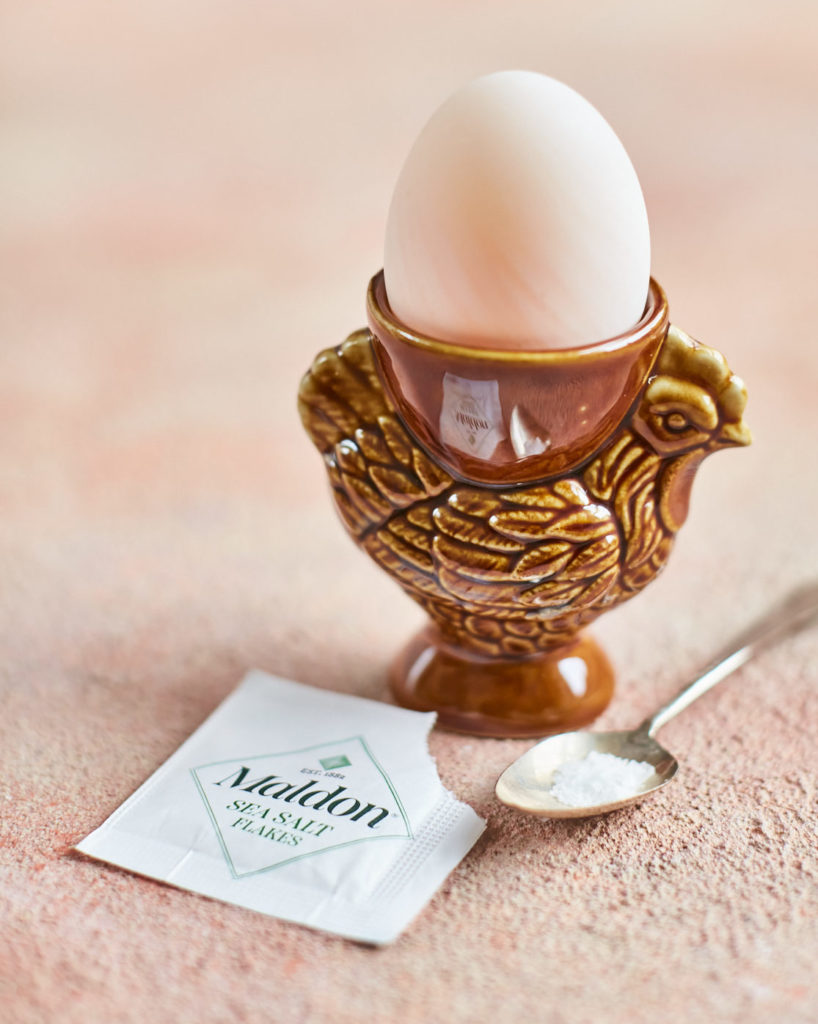
Our new sachet format has been developed working with – and at the direct request of – the hospitality industry, adding tangible value to the marketplace, says Maldon’s Global Commercial Director Robert La Francesca; they are also an ideal front-of-house solution in a difficult time of readjustment for many bricks and mortar operations.
At this vital time, the industry we love is in need of support. Competition for spend is fierce – eat-in customers are excitedly returning and seeking inspiring menus and experiences, while the options for takeaway and delivery customers are growing by the week. The new sachets answer both of these challenges, while adding real value to the offering and signal the start of an exciting innovation programme from Maldon Salt – we really listen to our customers and diners and so we’re extremely excited to be working on new ideas that will hopefully continue to delight and inspire existing and new audiences. We urge operators to get in touch and try the new sachets today!
Want to find out more? email us on info@maldonsalt.co.uk
Tuna steaks are deliciously meaty and pack a lot of flavour when griddled or pan-fried.
This recipe shows you how to make a tuna steak that is beautifully tender, paired with a Salsa Verde infused with parsley, capers, mustard and of course Maldon Salt to elevate the flavours and release an irresistible tanginess to the sauce.
Because tuna steaks are impressive course to serve at a dinner party, it’s important to serve equally crowd-pleasing sides with this dish. Try our baked Hasselback potatoes what are delightfully golden and crispy which pair nicely with your tuna steak. If you are tight on time, you can whip up a cucumber salad, which is light, refreshing and easy to make!
Here is how to make our Grilled Tuna Steak with Tomato and Salsa Verde recipe…
- Start by making the Salsa Verde. In a food processor or blender place all the ingredients and blitz together to form a paste. This can be as smooth or chunky as you like. Set to one side.
- Next, prepare the tomato salad. Place the cherry tomatoes and black olives in a small bowl. Add a good drizzle of olive oil, cracked black pepper and a pinch of Maldon Salt. Mix it altogether and set to one side.
- Heat up a griddle pan on a medium high heat. Rub each side of the tuna steak with olive oil.
- Once the griddle pan is hot, add the tuna steak and fry on each side for approximately 2 minutes on each side, allowing the pan to create char lines across the flesh.
- After each side of the tuna is grilled, remove from the pan. Set aside to rest.
- Now it’s time to plate up, serve the griddled tuna steak on a plate piled next to the tomato salad, a drizzle of Salsa Verde and some garnish of basil leaves.
- Finish with cracked black pepper and a pinch of Maldon Salt.
Buying tuna steaks
When you are buying tuna steaks, you need to look for firm, red or dark red flesh and make sure it is from a sustainable source. Ideally you want you choose thicker steaks as these will cook better than thinner sized steaks/loins.
How to cook tuna
It’s important to note that tuna fish can dry out quickly, turning unpleasant and crumbly in texture. When cooking, you only need to place it on the pan/griddle/BBQ very briefly over high heat. Tuna can be served cooked to rare, or cooked to have a crust on the outside but remain raw in the centre – this is called ‘Tataki’ in Japan.
This pizza dough recipe is incredibly simple and only requires one prove before its ready to use. This recipe is topped with tomato, mozzarella, prosciutto, parmesan and rocket but you can top with whatever you like!
Start by making the pizza dough. Place the flour into a large bowl and sprinkle in the Maldon salt, mixing well. Then make a well in the middle of the flour. In a jug mix together the warm water, yeast, sugar and olive oil and whisk it together. Let this sit for 3 minutes.
After 3 minutes pour the mixture into the well in the flour. Use a wooden spoon to slowly incorporate the flour into the wet mixture. When it starts to come together then use your hands to bring the dough together. Tip it onto a clean work surface and knead the dough to help bring it together. Then continue to knead for 10 minutes until you have a smooth, supple dough.
Lightly grease a large bowl and then place the dough into the bowl and cover with clingfilm. Place the bowl in a warm place and allow it to prove for 1 hour until it doubles in size.
Preheat the oven to 220C and place either a pizza stone (if you have!) or a large baking sheet into the oven so it warms up.
While the dough is proving, mix up the tomato base for the pizzas. In a small bowl mix together the passata, grated garlic, dried oregano and plenty of Maldon salt and cracked black pepper. Set aside.
After an hour the dough should have doubled in size. Then remove the clingfilm and knock back the dough by punching out the air from dough and giving it a quick knead. Then divide the dough into 4 equal balls.
On a piece of baking parchment sprinkle generously with semolina before rolling out one of the pizza balls to roughly 25cm in diameter, leaving a slightly thicker ring around the edge for the crust. Then spoon on some of the passata mix and spread out a thin, even layer on the base but leaving a gap for the crust. Top with some torn mozzarella and prosciutto. Then slide the pizza onto the hot tray in the oven and cook for 10 minutes.
The pizza is ready when the crust has puffed up and gone golden brown, and the mozzarella has melted and gone oozy. Remove the pizza from the oven and top with chilli flakes, parmesan shavings and fresh rocket. Finally drizzle with some extra virgin olive oil and a final pinch of Maldon salt and cracked black pepper. Cut the pizza up and enjoy.
You may think making ice cream from scratch is difficult, but it’s really not! Following this non-churn method will leave you with a gorgeously smooth ice cream without the faff of investing in an ice cream maker.
We make a delicious blackcurrant coulis to act as the ripple for the ice cream. All you need for the coulis is berries, sugar and lemon, in which you heat up on the stove to gain a consistency similar to jam. This is perfect to drizzle on top of the ice cream. Make sure to include the sweetness of the condensed milk and double cream to balance out the sharp tang of the blackcurrants.
Please note, if you can’t get hold of fresh blackcurrants then frozen will do, you will just have to simmer the coulis for a little longer to thicken. You can also use any other seasonal berries if you are making this at another time of year!
You can serve this ice cream with a delicious slice of chocolate cake, or even incorporated as one of the layers within our classic within our classic Knickerbocker Glory, which is perfect to be enjoyed in the sun.
- Start by making the blackcurrant coulis for the ripple. In a saucepan add the blackcurrants, sugar and lemon juice.
- Heat up the mixture and allow it to simmer for 10 minutes so it thickens and resembles jam.
- Tip the blackcurrant coulis into a bowl and place in the fridge to cool it.
- Whilst it cools, make the ice cream base. In a large bowl add the double cream and use electric beaters (or you can do by hand) to beat the cream until it forms stiff peaks.
- In a separate bowl, whisk together the ricotta, condensed milk, vanilla bean paste and pinch of Maldon Salt. Add the double cream into the ricotta mix and fold the mixture through so it is smooth.
- Tip this mixture into a freezer safe container and place into the freezer.
- Once the coulis mixture has cooled, take the ice cream out the freezer and then dollop some of it across the top, then use a cutlery knife to ripple this throughout the ice cream. You won’t need to use all the coulis, and if you have some leftover then it is delicious drizzled over the ice cream when serving!
- Once the blackcurrant has been rippled through then place the container back in the freezer and freeze overnight.
Does it matter if I use fresh or frozen berries?
If you are blending your berries for a coulis, you can use either fresh or frozen. However, it is known that frozen fruit is often softer and sweeter in taste than fresh fruit. This is because the water in the fruit expands when frozen, releasing delicious, natural sugars as they slowly begin to melt.
Can this recipe be made in an ice cream maker?
Absolutely! Brands like Magimix and Ninja have wonderful appliances that can transform homemade ice cream and sorbets in less than 40 minutes. However, the non-churn method works just as well…you will just need to have a little more patience. We recommend freezing the ice cream overnight for best results.
Can I use clotted cream instead of double cream?
To make sure your homemade ice cream will come out deliciously creamy, we recommend using heavy cream. A heavy cream, also known as heavy whipping cream, is a thicker part of milk that rises to the top because of it’s high fat content. Although clotted cream has a very high fat contents, when frozen, the cream becomes dry and crumbly when defrosted and it’s looses it’s iconic creamy texture. As a result, we recommend double cream, as it is easy to whip and when frozen it still retains is silky, rich texture.