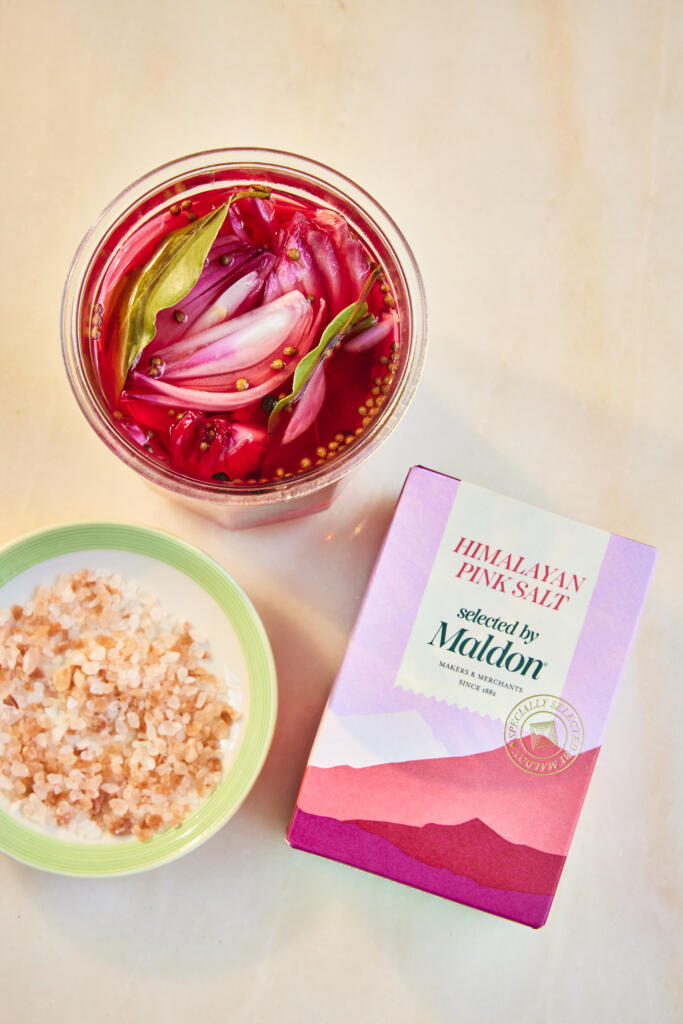
These quick pickled red onions are the easiest way to add tangy crunch and colour to everything from tacos to salads. A hot brine of apple cider vinegar, warm spices and honey is poured over thinly sliced onions, then finished with Himalayan Pink Salt, Selected by Maldon for clean, bright seasoning. They turn vivid pink in just a few hours and keep well in the fridge — an effortless, make‑ahead topping you’ll use all week.
How to Make Quick Pickled Red Onions?
Pack sliced onions in a sterilised jar.
Simmer vinegar, honey, spices and Himalayan Pink Salt, Selected by Maldon; pour over onions.
Seal, cool and refrigerate until bright pink (2–12 hours).
Keep refrigerated; use within 2 weeks.
How to Make Quick Pickled Red Onions (Detailed Version)
Step 1 – Prep the Jar & Onions
Thinly slice red onions (a mandolin helps).
Pack into a large, sterilised heatproof jar. To sterilise quickly, wash, then heat the jar in a 160°C (320°F) oven for 10 minutes; air-dry lids.
Step 2 – Make the Hot Brine
Add vinegar, honey (or sugar), coriander seeds, peppercorns, bay leaves and Himalayan Pink Salt, Selected by Sea Salt to a small pan.
Bring to a gentle simmer, stirring to dissolve, then remove from heat.
Step 3 – Pour & Seal
Immediately pour hot brine over onions to fully submerge.
Seal, cool to room temperature, then refrigerate.
Step 4 – Chill & Serve
Leave to pickle a few hours until bright pink (flavour deepens overnight).
Serve cold; keep onions submerged in brine.
Tips & FAQs
Tips
Slice evenly (1–2 mm) for fast, even pickling.
Pack tightly and submerge fully; top up with a splash more vinegar if needed.
For softer bite, blanch slices in boiling water for 10 seconds; drain before jarring.
Use caster sugar or maple syrup to make the recipe vegan.
FAQs:
How long do pickled red onions last?
Up to 2 weeks refrigerated in a clean, sealed jar. Always use clean utensils and keep onions submerged.
Can I use different vinegar?
Yes. White wine or red wine vinegar work; avoid malt vinegar for this style (overly strong).
Do I need to sterilise the jar?
Recommended for best quality. This is a refrigerator pickle (not canned); always store in the fridge.
Can I reduce the sweetness?
Yes. Adjust honey/sugar to taste; salt and acid provide the primary preservation.
When are they ready to eat?
After 1–2 hours for a quick pickle; best flavour and colour after 12–24 hours.
Can I add other flavours?
Try chilli flakes, fennel seeds, citrus peel, or garlic. Keep the basic acid‑salt ratio.
Serving Suggestions
Tacos, burritos and quesadillas
Burgers, hot dogs and pulled pork sandwiches
Grain bowls, salads and slaws
Avocado toast, fried eggs or shakshuka
Cheese and charcuterie boards (drain lightly, sprinkle Maldon flakes)
Storage & Safety
Refrigerate immediately after cooling; keep onions submerged.
Use within 14 days. Discard if cloudy, fizzy, mouldy or off‑smelling.
Always use clean utensils to avoid contamination.
Do not shelf‑store; this is not a canned product.
Blend up a frozen mango margarita with bold mango sweetness, fresh lime and smooth tequila — finished with a punchy Maldon Chilli Sea Salt rim. This easy blender margarita pours ice‑cold with a perfectly slushy texture, balancing sweet, tart and gently spicy notes in every sip. Ideal for summer parties, BBQs or whenever you need a sunshine‑bright cocktail in minutes.
How to Make a Frozen Mango Margarita with Chilli Salt Rim
Step 1 – Blend the Margarita
Add tequila, triple sec, lime zest and juice, frozen mango, agave (if using) and ice to a blender.
Blend on high until smooth and slushy, 20–40 seconds.
Taste; adjust sweetness or lime to preference.
Texture cue: thick but pourable, like a soft‑serve slush.
Step 2 – Prepare the Chilli Salt Rim
Run a lime wedge around the rim of a chilled margarita glass or coupe.
Tip Maldon Chilli Sea Salt onto a small plate, then dip and roll the rim to coat evenly. Shake off any excess.
Step 3 – Pour & Garnish
Pour the blended margarita into the rimmed glass.
Garnish with a lime wedge or slice and serve immediately.
Tips & FAQs
Tips
Use frozen mango for body and chill; if using fresh mango, add more ice and a few frozen mango cubes.
A pinch of salt inside the blend can lift flavour, but the Maldon Chilli Sea Salt rim adds the perfect finishing contrast.
For a thicker slush, add extra frozen mango or ice; for a looser pour, add a splash of cold water.
Yes. Replace with 15–25ml agave syrup and a splash of water (or orange juice) to balance.
What’s the best tequila for a frozen margarita?
A good 100% agave blanco showcases mango and lime; reposado works if you prefer a rounder, mellow finish.
How do I make it spicy?
Keep the Maldon Chilli Sea Salt rim and optionally blend in 1–2 thin jalapeño slices or a pinch of chilli flakes.
Can I batch this for a party?
Multiply ingredients, blend in batches, and keep a jug in the freezer for 10–15 minutes to hold the slushy texture. Rim glasses to order.
How do I fix a too‑sweet or too‑tart margarita?
Add lime juice for sweetness balance, or a touch of agave for tartness. A small pinch of Maldon Sea Salt enhances balance.
Serving Suggestions
Serve as a welcome drink with salty snacks (salted almonds, tortilla chips with pico de gallo).
Add tropical twists: passion fruit pulp, pineapple or a dash of coconut water.
Create a frozen mango‑chilli “float”: small scoop of mango sorbet on top, dust with Maldon Chilli Sea Salt.
Storage & Reheating
Best enjoyed immediately.
For make‑ahead, blend the base without ice and freeze in ice‑cube trays; blend cubes with fresh ice just before serving.
If the drink separates, pulse the blender a few seconds to re‑slush.
Extracted from Flavour Heroes by Gurdeep Loyal(Quadrille, £27), Photography by Patricia Niven
This month, we’re diving into Flavour Heroes by Gurdeep Loyal – a vibrant, genre-blurring collection of recipes that proves pantry staples are anything but basic. With clever, global twists and bold, satisfying ideas on every page, this book is a true celebration of home cooking at it’s most creative (and craveable!) Whether you’re a seasoned chef or an enthusiastic beginner, Gurdeep’s flavour-forward approach to cooking is a delicious invitation to transform everyday meals with a dash of something special.
At the heart of Flavour Heroes are 15 global pantry essentials – from punchy harissa and rich pecorino Romano to fiery ‘nduja and umami-packed miso – used in inspired and unexpected ways. Gurdeep’s recipes show just how versatile and liberating these ingredients can be, inviting you to bend the rules and unlock new flavour profiles, from comfort classics to modern showstoppers. This is everyday cooking, supercharged – and we can’t wait to dig in!
Gurdeep Loyal is an award-winning food and travel writer and culinary trends expert with over 18 years of industry experience at gourmet institutions including Harrod’s Food Halls,Marks & Spencer Food and Innocent Drinks. Adding to his accolades, Gurdeep was the winner of the Jane Grigson Trust Award for his debut cookbook, Mother Tongue, which explores his culinary upbringing, combing ‘authentic’ home-cooked Punjabi food with ‘inauthentic’ curry-house Tika Masalas, the western foodie cannon, and a wanderlust for travel in pursuit of flavour. You can find Gurdeep as a regular guest on the Olive Podcast, as well as being a monthly columnist for the Olive Magazine.
In Conversation with Gurdeep Loyal
Gurdeep, we are loving Flavour Heroes! The book is all about turbocharging everyday meals with pantry staples. What inspired you to focus on these 15 particular ingredients – what makes them true ‘heroes’ in your eyes?
With Flavour Heroes I wanted to shine a light on 15 pantry powerhouses that can dial up your home cooking at the simple twist of a lid. For me a ‘Flavour Hero’ is an ingredient that delivers big flavour for little effort – and that also has the ability to be adapted and remixed into thousands of different delicious directions. The book I hope will empower and liberate home cooks to reach for these heroes when they cook as freely as a painter might reach for colours in a painters palette. I also wanted to celebrate some exciting newer ingredients that people might be less familiar with – like Yuzu Kosho (a Japanese citrus-chilli paste) and Calabrian Chilli Paste. These are all ingredients that transformative superpowers to amplify your cooking every day.
What’s an example of a flavour combo in the book that surprises people – but totally works!
One of my favourite ingredients in the world is Mango Chutney! Lots of people only use it to dollop along side a curry, or in a festive sandwich, but it’s such a brilliant ingredient to cook with. It’s tropical, vinegary, complexly fruit and often layered with ginger, garlic and spices. The ‘Halloumi, Mango Chutney, Courgette and Tarragon Pizzettes’ are a very ‘me’ flavour combination – that shouldn’t work but really does. The saltiness of the halloumi, and sweetness of the mango chutney are a wonderful contrast, and the tarragon echoes the flavour of nigella seeds which are often in mango chutney. Combined, it’s delicious to eat! The most unusual combination in the book is the ‘Kopi-Sambal Salmon with Pistachio Dukkah’ – that combines fiery Sambal Olek with Instant Espresso Coffee Powder. Sounds strange, but it has to be tried. It’s sublime!
For someone who’s just getting started on their flavour journey, which three ingredients from your hero list should they try first?
A good harissa is a fantastic chilli paste to have in your pantry. It has a rich, intense, complex flavour that can liven up anything – from a humble bag of carrots to a fancy lobster salad. Miso is a true panty powerhouse, with it’s salty, umami, savouriness that can add delicious depth to anything from Bolognese to chocolate fudge cake (which I have a recipe for in the book). And I love Dark Maple Syrup – it has a lovely rich, amber toffee flavour, that adds something totally unique, in both sweet and savoury dishes.
With 90 delicious recipes to choose from – come on, you MUST have a favourite that you like to make?
The ‘Fennel Sausage, Gochujang and Vodka Pasta ‘recipe is one that I make the most – it’s a perfect mid-week meal, but also great to wow a crowd. The flavours just have this magical alchemy together. The Peanut-Butter Pie with Cinnamon Cereal Crust is the most decadent recipe in the book – a slightly obscene deep filled dessert that’s worth every calorie!
What does a normal day in the life look like for you, Gurdeep?
A combination of lots of eating, lots of emailing, and lots of procrastinating! As a food and travel writer I’m very luck that every day is different. I’m an early riser, so I try to get in a workout early if I can. Then I spend time researching and writing up anything I’m working on – like my monthly columns in Olive Magazine and Scribehound, or it could be a book I’m working on or a travel piece for a magazine. As a food trends specialist, I then try to get out and about in search of one or two brand new things in food every day – maybe a new restaurant, or a cool new brand, or an independent maker, or a craft bakery. Throughout my morning travels I’ll pick up ingredients that I need for the afternoon when I do my recipe testing in my tiny East London kitchen. And if I have the energy, I’ll see friends in the evening – taking them each a doggy bag each from my days cooking!
Name three things in the kitchen you can’t live without.
A microplane! I use it for everything, from nutmeg and garlic, to lemon zest and chocolate. A good sturdy pestle and mortar for spices – nothing beats the smell of gently toasted spices ground by hand (cardamon and cumin in particular, especially ground together). And smoked salt. I use it so often – it brings a wonderful smoky depth to dishes that I love.
Do you have a current favourite cookbook that you’re enjoying? We’d love to know!
Ferment by Kenji Moromoto. He is so inventive with his recipes, and a genius with home fermenting. The book has brilliant recipes in it – particularly the Kimchi Bhajis.
Mango Chicken Schnitzel with Lime-Leaf Smashed Peas Recipe
Extracted from Flavour Heroes by Gurdeep Loyal(Quadrille, £27), Photography by Patricia Niven
Schnitzels and mushy peas both have a nostalgic seventies Fanny Cradock-meets-Wimpy-diner charm that Gurdeep is always drawn to – crying out for the addition of pineapple rings to garnish, piped green mashed potato and silver jugs of parsley sauce on the side. Gurdeep’s flavour elevated take on these culinary relics uses mango chutney to add tropical pizzaz to the chicken, and lime leaves to bring Southeast Asian fragrance to the smashed peas. Arguably so retro it’s back, although in Gurdeep’s opinion, these two culinary superheroes will never be out of vogue.
Serves: 2
Ingredients:
5 Tbsp mango chutney, plus extra to serve
3 fat garlic cloves
1 Tbsp Worcestershire sauce
2 Tbsp apple cider vinegar
500g (1lb 2oz) chicken breasts (2 large ones), boneless and skinless
Cornflour (cornstarch), for dredging
1 large egg
60g (2¼oz) panko breadcrumbs
1 Tbsp nigella seeds
2 Tbsp sesame seeds
Sunflower or vegetable oil, for frying
Maldon Sea Salt
Freshly ground black pepper
Lemon wedges, to serve
For the lime-leaf smashed peas:
400g (14oz) frozen peas
12–14 fresh makrut lime leaves
30 fresh mint leaves
Zest and juice of 1 small lemon
20g (¾oz) butter
Splash of olive oil, for frying
2 whole spring onions (scallions), finely chopped
Method:
Put the mango chutney, garlic cloves, Worcestershire sauce, vinegar, 1 teaspoon of Maldon Sea Salt and 1 teaspoon of black pepper in a small blender and whizz to a fine paste.
Place one of the chicken breasts between two sheets of baking paper and use a rolling pin to gently flatten into a thin steak approximately3–4mm (1/8in) thick. Don’t bash hard or the meat will tear! Repeat with the other breast.
Transfer them to a large bowl and smother both breasts all over with the mango marinade, then leave for at least 30 minutes. Prepare the smashed peas. Boil the peas in a pan of salted water for 3 minutes, then drain and set aside. Use a small blender to whizz together the lime leaves, mint, lemon juice and 1 teaspoon of zest to a very fine paste.
Melt the butter in a pan with a splash of oil, then add the green paste, frying over a medium heat for 2 minutes. Next, add the spring onions, cook for another minute, then add the cooked peas, plus 1 teaspoon of salt. Cook for a final minute, then either smash chunkily with a potato masher, or use a hand blender to turn into a mushy pea purée. Keep warm.
To coat the schnitzels, prepare three large bowls: one with cornflour, one with beaten egg, and one with a mix of breadcrumbs, nigella seeds and sesame seeds.
Dredge one marinated chicken schnitzel in the cornflour, flipping it to coat all over. Leave for30 seconds, then dredge again so the surface is completely covered. Shake off the excess, then dip into the egg, and finally into the breadcrumbs, coating liberally all over. Repeat with the second schnitzel.
Heat 2cm (¾in) of sunflower or vegetable oil in a deep frying pan to 165°C/329°F. Cook the schnitzels, one at a time, over a medium heat for 6–7 minutes – turning occasionally – until crunchy and golden brown on the outside and cooked through. Serve with the smashed peas, lemon wedge and extra mango chutney on the side.
Buy Flavour Heroes with Gurdeep Loyal
Extracted from Flavour Heroes by Gurdeep Loyal(Quadrille, £27), Photography by Patricia Niven
You can find where to purchase Gurdeep’s NEW cookbook here and start being creative with food and flavours in the comfort of your kitchen.
Make sure you have your Maldon Salt ready for these recipes! If you are running out, please feel free to browse on our Where to Buy Page to find your nearest store in which stocks our beloved Maldon Salt.
Lastly, we LOVE seeing your creations – please tag us on Instagram using the #maldonsalt so we can share your own take on Gurdeep’s recipes!
When the heat of summer sets in, nothing hits the spot quite like a chilled bowl of gazpacho. This classic Andalusian soup is a vibrant blend of ripe tomatoes, crisp cucumbers and punchy onions, all pureed to smooth perfect. Light, hydrating, and bursting with garden-fresh flavour. It’s the ultimate warm-weather dish.
What takes this gazpacho to the next level is a finishing touch of Maldon Chilli Sea Salt. It’s delicate flakes and gentle heat from the Aleppo pepper and bird’s eye chilli adds a kick to the natural sweetness of the tomatoes whilst adding a subtle heat that lingers just enough to keep each spoonful exciting. Serve it topped with diced cucumber, juicy tomato halves, a drizzle of extra virgin olive oil, and fresh basil leaves.
How to Make Gazpacho
Step 1 – Tame the Onion
Boil a full kettle. Put the chopped onion in a sieve over the sink.
Pour the boiling water over to soften bite and mellow raw flavour. Drain well and cool.
Step 2 – Blend the Soup
Add onion, tomatoes, peeled cucumber, red pepper, garlic, sherry vinegar and olive oil to a blender.
Season with a big pinch of Maldon Chilli Sea Salt.
Blend until smooth (or leave slightly chunky). Taste and adjust salt and vinegar to balance. The texture should be silky and pourable but not watery.
Step 3 – Chill
Transfer to a jug or container, cover and chill at least 2 hours (longer improves flavour).
Stir before serving as natural separation can occur.
Step 4 – Make the Topping & Serve
Toss diced cucumber, cherry tomatoes, basil and a pinch of Maldon Chilli Sea Salt with a drizzle of olive oil.
Pour soup into bowls or small glasses, add 1–2 ice cubes per serving, spoon over the topping and finish with a little olive oil. Serve the soup well-chilled.
Tips & FAQs:
Tips
Use ripe, in‑season tomatoes for natural sweetness and colour.
Don’t skip chilling — it rounds acidity and lets flavours meld.
For extra body, blend longer to emulsify the olive oil thoroughly.
Prefer a super‑smooth finish? Blend, then pass through a fine sieve.
Adjust heat with Maldon Chilli Sea Salt at the table for clean, crunchy warmth.
FAQs:
What’s the best vinegar for gazpacho?
Sherry vinegar delivers classic depth and balance; red wine vinegar works in a pinch.
Can I make gazpacho ahead?
Yes. Make 1–2 days ahead; flavours improve. Stir and re‑season with salt/vinegar just before serving.
Can you freeze gazpacho?
You can freeze for up to 2 months. Thaw overnight in the fridge and re‑blend to restore texture.
How do I thicken gazpacho without bread?
Emulsify longer, or add extra tomato and a little more olive oil. If desired, blend in a small piece of peeled cucumber for body.
How do I make it spicier?
Add a small fresh chilli to the blend or increase the Maldon Chilli Sea Salt sprinkle when serving.
Is this gazpacho vegan and gluten‑free?
Yes — as written, it’s naturally vegan and gluten‑free.
Serving Suggestions
Serve in small glasses as a canapé shot for summer parties or alongside a tapas spread.
Pair with tortilla Española, grilled prawns, or crusty bread with olive oil.
Garnish variations: diced roasted pepper, finely chopped red onion, or a swirl of basil oil.
For a lighter lunch, add a side of leafy salad with lemon vinaigrette.
Storage & Make-Ahead
Refrigerate in an airtight jug or container for 3–4 days.
Keep toppings separate; add just before serving to maintain crunch.
Not intended for reheating. If separation occurs, stir or briefly re‑blend.
Clean the asparagus and slice to thumb sized pieces
Wash the thyme.
Wash the parsley and chop finely,
Coarsely grate the parmesan.
Prepare the barbecue for direct heat at around 220 degrees
Place the griddle in the GBS® cooking grate and close the lid on the barbecue. Preheat for 5 minutes.
Add the butter to the griddle and allow to melt. Then add the onion and thyme. Fry gently, stirring continuously, until the onions are glossy. Then add the rice and white wine to the wok.
Bring the white wine to the boil and reduce by half while stirring then add the asparagus.
Gradually add the chicken stock, stirring the rice frequently. When the liquid has been absorbed, add some more – When the rice and asparagus is tender, finally add the peas.
Before serving, add the cream. Flavour the risotto with parmesan, Maldon Smoked Sea Salt, pepper and a little lemon juice. Garnish with finely chopped parsley, walnuts and hazelnuts.
When Melissa was a teenager her parents took her to Tenerife. She won’t lie, they were all quite bored. And then they fell upon their very special potatoes, cooked in salty water – even seawater – until the liquid has all but evaporated leaving a sparkly sediment on their skin. It was served with a very simple roast chicken, all of which Melissa recreated here. It’s a celebration of great produce, fire and excellent Maldon Salt – when the foundations are this good, you need little else.
Here is how to make Salt-roasted Chicken with Potatoes and Canarian Mojo Rojo
Spatchcock your chicken by standing it up and holding with one hand, and using the other to cut down either side of the backbone to remove the back. You can also use meat scissors. Save the back to make a stock.
In a tray, lay the chicken breast-side down and pour over 1.5tbsp of oil. Rub it all over, and then sprinkle with 1.5tbsp Maldon Garlic Sea Salt. flip the chicken over and do the same to the other side. Leave to rest while setting up the barbecue.
Lay the chicken indirect, away from the coals. Put the onions directly in the coals and lay the red peppers on the grate, over the coals. Close the lid. Half-close the bottom vents and leave the top vents mostly open – you’re aiming for a temperature of between 160-180C.
Boil the potatoes in heavily salted water on a fast boil until a sharp knife goes easily into them and then drain. Drizzle with a little bit of oil and put on the grill, directly over the coals. Move them around every 5 minutes until they colour and then push to the indirect side.
Once the onions are soft when pressed, and the peppers blackened all over, remove from the heat. Once cool enough to handle, peel them and remove the seeds from the peppers. Add to a blender with the remaining mojo rojo ingredients and a pinch of Maldon Smoked Sea Salt flakes and blitz until smooth.
Flip the chicken after 30 minutes. After another 15 minutes, move over to the direct side, skin-side down, to crisp up the skin. Flip once more, and probe the chicken at its thickest point – once it reads 70C internal, remove to a tray to rest.
After 10 minutes, carve the chicken and serve with the mojo rojo in a big bowl and the potatoes on the side.
For May’s pick in the Maldon’s Cookbook Club, we’re delighted to feature Stay for Supper by Xanthe Ross – a warm, generous, and deeply personal collection of vegetarian recipes that celebrate not just food, but the joy of eating together. Whether you’re cooking for two or feeding a table of ten, Stay for Supper is about more than just delicious meals – it’s a call to gather, to savour and to slow down. From her roots in rural Scotland to her thriving London supper clubs, Xanthe’s journey is woven through every page, filled with stories of muddy boots, greenhouse dinners, and bread baked with care. Her food philosophy is simple: seasonal ingredients, prepared with joy, and shared with love.
Xanthe’s laid-back, produce-led style of cooking shines in every recipe – from the comforting New Potato Frittata with Fresh Herb Salad to the playful indulgence of her iconic Meringue Tower.
This is a book for cooks who love to host, but also for those who just want a simple, satisfying weeknight dinner. Recipes are easy to scale and pair, with plenty of tips for stress-free hosting, seasonal menu planning, and thoughtful use of ingredients. The book truly feels like a warm invitation to pull up a chair, pass the salad, and stay a little longer with friends and family.
In Conversation with Xanthe Ross…
Xanthe, we truly love Stay for Supper so much! The book celebrates communal eating with a laid-back, joyful approach to cooking. What does the phrase ‘every meal should be a celebration’ mean to you?
Thank you so much! I think that phrase means to me that every meal, even the really simple ones, should give you an opportunity in the day to stop even just for 10 minutes and enjoy the process of putting together a meal and eating it. I think food is to be enjoyed and not just consumed in a rush, if we can.
You grew up in a large, food-loving household in rural Scotland. How has that shaped the way you think about food, sharing, and hospitality today?
The kitchen was always buzzing with energy growing up, because there were so many of us.. so, I think that’s definitely something that’s stuck with me. The way that I serve food at my events has definitely come from this family feel, of lots of dishes on the table, everyone sitting and eating together, and no one leaving until everyone was done, that was a rule for us growing up and a rule that I’m now so grateful for.
From White Miso Butter Beans to your iconic Meringue Tower, your dishes span from simple to show-stopping! Tell us, do you have a ‘secret’ favourite recipe in the book you can share with us?
I love them all! I think that the ‘show-stopping’ ones get the most credit but actually some of my favourites are the soups and stew, the underdogs that perhaps don’t get as much attention but are very deserving. I love making them in big batches to last me a few days of the week.
Hosting can feel intimidating for many people. What are your top tips for someone who wants to start throwing delicious suppers without getting overwhelmed?
Prep everything in advance, so that when it comes down to it you only have to either put something in the oven or take it out. And also, don’t stress about making anything too complex – sometimes it’s easier to wow people with simplicity anyway but also it means you’ll then have time to focus on other elements of hosting like laying the table, setting the right lighting and smells, and making everyone a drink when they arrive!
What does a normal ‘day-in-the-life’ look like for you, Xanthe?
It usually starts with a long dog walk, then yoga and meditation (some days), then breakfast. My work days honestly vary so much, if I’m prepping for an event then I’m cooking all day with my small team, but if there’s no event then I’ll get to my laptop around 9:30 and write out what I need to get done. If it’s not written down, it won’t happen! I try to make lunch in a big batch at some point in the week so I can just heat it up, and try to eat away from my desk. Afternoon, more work of whatever kind and then either I’ll finish with a yoga class or a bath, if I don’t have evening plans. My husband Hugo either cooks or I do, and then we are book nerds so get into bed pretty early to get as much reading time in as possible before falling asleep !
Name three things in the kitchen you can’t live without!
A lemon, salt (Maldon obvs), and good quality butter.
Do you have a favourite cookbook that you’re reading at the moment?
I was just given Nigel Slater’s memoir as a gift from a friend, so I’m excited to read that.
Xanthe was inspired to cook asparagus this way after trying a dish at the very beautiful Atelier September in Copenhagen. They served the asparagus cut into rounds like this and Xanthe has done it a lot since! The British asparagus season is so short that she tries to cook with them every day when they’re around. This means that later in the season, she may be searching for ways to cook them that keeps her inspired. Something simple like cutting them is definitely satisfying. Asparagus always matches beautifully with dairy because of it’s freshness, so it’s perfect when paired with ricotta.
Serves: 4 poeple
Ingredients:
200g (7oz) ricotta
zest and juice of 1/2 lemon
2 tablespoons extra virgin
olive oil
2 × 250g (9oz) bunches of asparagus
4 slices of bread, toasted
Maldon Sea Salt and freshly ground black pepper
GOES WITH:
Lentil and Mushroom Bolognese (page 82), Squash, Tahini, Crispy Sage and Hazelnuts (page 118), Leeks with Roasted Garlic and Walnut Sauce (page 140).
Method:
Put the ricotta, lemon zest and juice, 1 tablespoon of the olive oil, a sprinkle of Maldon Sea Salt and a generous grind of pepper into a bowl. Whisk until smooth and light.
Snap the woody ends off the asparagus, then cut them into 1cm (1/2 inch) rounds. Fill a bowl with cold water and ice and set it to one side.
Bring a large saucepan of generously salted water to the boil, then drop in the asparagus pieces and cook for about 1 minute. You want the asparagus pieces to remain crunchy, so be careful not to overcook them. Drain and transfer straight to the ice bath. This will stop the cooking and also help the asparagus keep their fresh green colour.
Cut the slices of toast in half and lay them on a plate. Spoon some of the ricotta onto each piece, then use the back of your spoon to spread it across the toast.
Drain the asparagus and pat them gently dry with a dish towel. Put them into a bowl, drizzle with the remaining olive oil and season with Maldon Sea Salt and pepper. Mix gently, then top the whipped ricotta with a generous spoonful of the dressed asparagus. Season again if you like, then serve immediately.
You can find where to purchase Xanthe’s NEW cookbook here and start being creative with food and flavours in the comfort of your kitchen.
Make sure you have your Maldon Salt ready for these recipes! If you are running out, please feel free to browse on our Where to Buy Page to find your nearest store in which stocks our beloved Maldon Salt.
Lastly, we LOVE seeing your creations – please tag us on Instagram using the #maldonsalt so we can share your own take on Xanthe’s recipes!
Beat the summer heat with this easy strawberry mojito recipe! Muddled strawberries, fresh mint, zesty lime, and a splash of rum (or keep it alcohol-free) combine for the ultimate refreshing drink. Topped with sparkling water and a pinch of Maldon Salt, this homemade mojito is bursting with flavour—perfect for garden parties or relaxing afternoons.
How to Make a Strawberry Mojito
Step 1 – Make the Simple Syrup
Combine sugar and water in a small pan over medium heat.
Cook gently until sugar dissolves, then cool.
Step 2 – Muddle the Ingredients
In two tall glasses, add strawberries, mint, simple syrup, and a pinch of Maldon Sea Salt.
Muddle until strawberries are smushed and juicy. Use a muddler or the end of a wooden spoon for best results
Step 3 – Mix the Drink
Add a handful of crushed ice to each glass.
Add lime juice and white rum (if using).
Stir gently.
Step 4 – Top and Garnish
Top up with more crushed ice and sparkling water.
Garnish with extra mint leaves.
Tips
For a non-alcoholic mojito, simply omit the rum.
Use very ripe strawberries for maximum flavour and colour.
Adjust sweetness by adding more or less simple syrup.
Can I make a strawberry mojito without alcohol?
Yes, you can make a strawberry mojito without alcohol, which makes it a mocktail version. Simply take out the white rum and leave the sparkling water. This is refreshing and still tastes delicious!
Can I use frozen strawberries?
Yes, you can definitely use frozen strawberries for a mojito. This will make the drink slightly sweeter in taste and have a stronger flavour than fresh strawberries. This is because of the way that they are frozen and thawed. Fresh strawberries have a more delicate and diluted flavour due to withstanding transport.
How do I batch this recipe for a party?
To batch make strawberry mojitos for a party, you’ll need to scale up the ingredients proportionally and prepare the base in advance for easier serving! Here is a guide to make a batch for 10 people, which is five times the original recipe for 2 people.
125g granulated sugar
125ml water (to make simple syrup)
20 strawberries, roughly chopped
Large handful of fresh mint leaves (about 2 packed cups)
Crushed ice (as needed, for serving)
Juice of 5 limes (approx. 150ml)
500ml white rum (optional, adjust to taste)
Sparkling water (to top up each glass)
5 pinches of Maldon Sea Salt (or add a small pinch per glass)
What’s the best rum for mojitos?
Accordingly to Liquor.com, the best overall rum for mojitos is The Real McCoy 3 Year Old Rum, which has tasting notes of vanilla, banana and coconut. If you want something a little less expensive, Bacardi is also just as good. It’s light, floral and not overpoweringly sweet, allowing it to blend nicely with the mint and strawberries.
Serving Suggestions
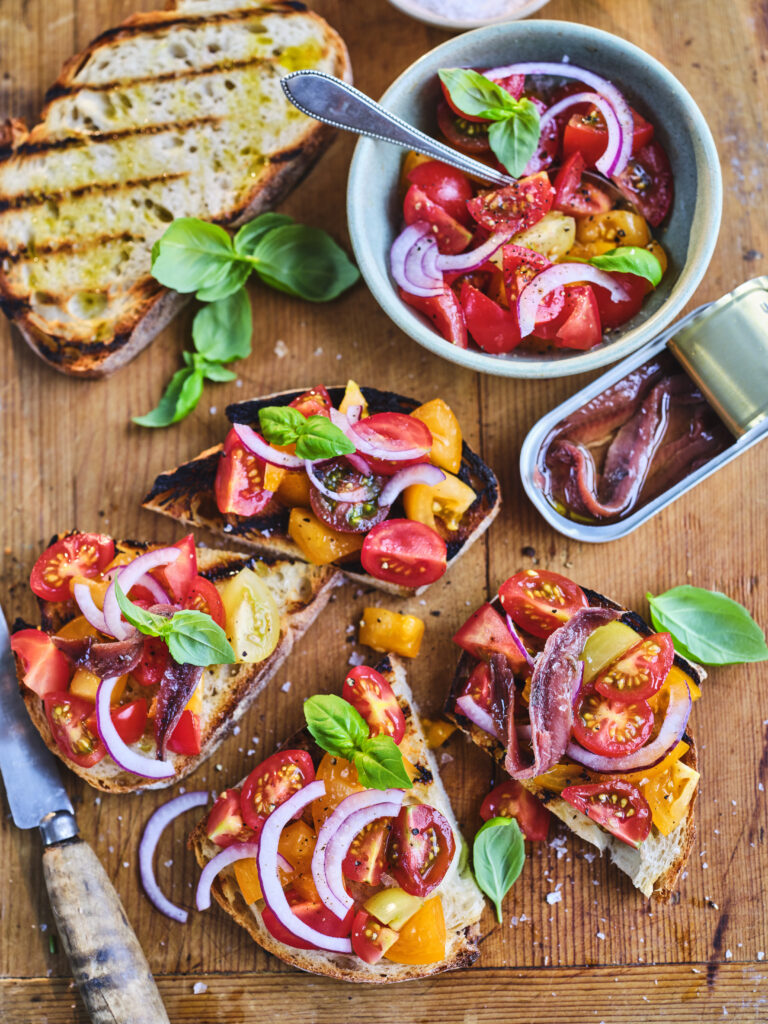
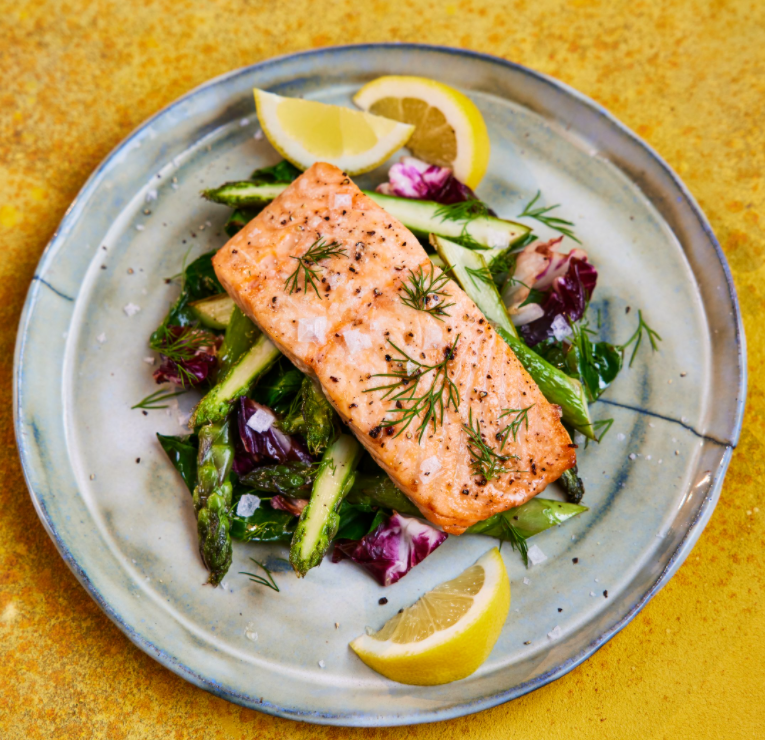
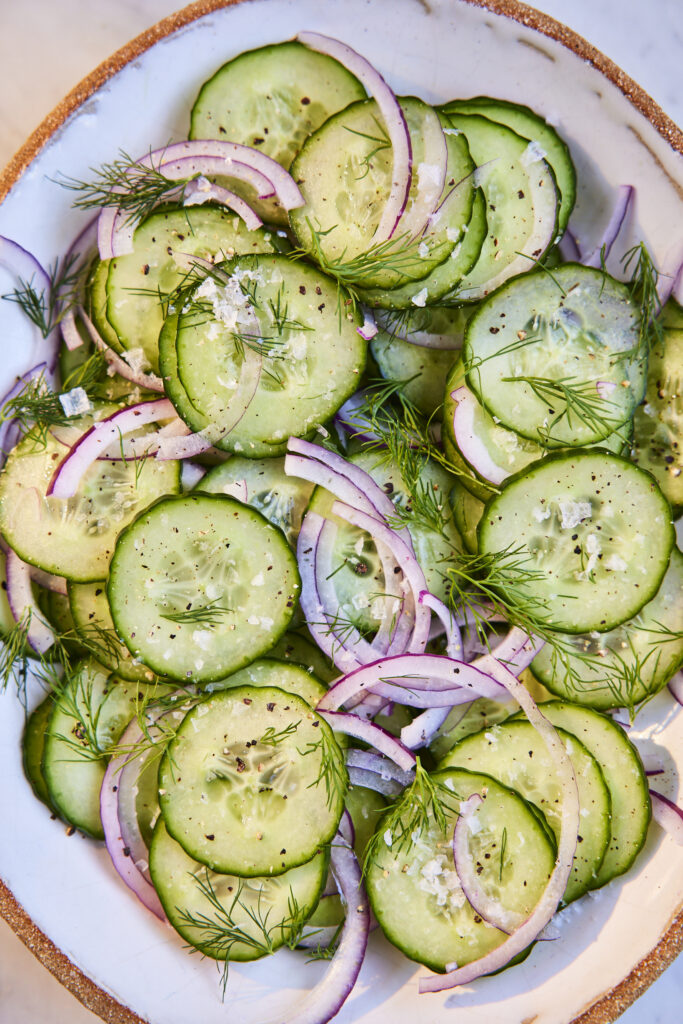
Bruschetta Grilled SalmonCucumber Salad
Serve in tall glasses with extra mint and lime wedges.
Simple syrup can be made ahead and stored in the fridge for up to a week.
Prepare mojitos fresh for best flavour; muddled fruit can be kept chilled for a few hours.
You should never reheat a mojito and should only be served cold. Heating certain spirits, like rum, can mask the flavour and lower the potency, causing the drink to taste dull and unbalanced.
If you make this strawberry mojito, let us know in the comments! For more refreshing summer drinks, explore our cocktail collection.
For the nachos, cut the tortillas into nacho-sized triangles. Heat vegetable oil in a large, heavy-based pan. To test the temperature of the oil, add one piece of tortilla, if it sizzles and turns lightly golden within a minute or so, the oil is ready.
Fry the tortillas, working in batches to prevent overcrowding. Once lightly golden and crisp, transfer to a tray lined with kitchen paper to absorb any excess oil. Immediately sprinkle with Maldon salt.
For the pico de gallo, mix the finely chopped onion with the lime juice and a pinch of Maldon Sea Salt. Set aside to soften for 5 minutes or so as you chop the rest of the ingredients.
Stir through the tomatoes, jalapeños and coriander. Season with Maldon Sea Salt to taste.
For the salsa verde, char the peppers, either over a gas flame or under the grill until the skin is charred all over. Transfer the charred peppers to a large bowl and cover with a plate. This allows the peppers to steam and makes peeling off their skins easier.
As the peppers cool, mix the finely chopped onion with the lime juice and a pinch of Maldon Sea Salt. Set aside to soften for 5 minutes.
Once cool, remove and discard the charred pepper skins and seeds. Very finely chop the peppers. Add these to the onion mix, along with the jalapeños and coriander. Mix and season to taste.
Enjoy a burst of summer flavours with this rigatoni pasta tossed with oven-roasted courgettes, red peppers, and juicy cherry tomatoes. Finished with olives, fresh basil, and a sprinkle of Himalayan Pink Salt, this easy roasted vegetable pasta recipe is perfect for a vibrant weeknight dinner or a healthy meal-prep option.
How to Make Rigatoni with Roasted Summer Vegetables
Step 1 – Roast the Vegetables
Preheat oven to 200°C (fan).
Spread courgettes, peppers, cherry tomatoes, and garlic on a large roasting tray. Make sure to roast in a single layer for best caramelisation
Season with Himalayan Pink Salt, pepper, and chilli flakes; drizzle generously with olive oil and toss.
Roast 25–30 minutes, until tomatoes char and vegetables are golden.
Slip garlic from skins and mash with a fork.
Step 2 – Cook the Pasta
Boil a large pot of salted water.
Cook pasta until just shy of al dente.
Reserve a mug of pasta water, then drain.
Step 3 – Combine and Finish
Return pasta to the pot with roasted vegetables, tray juices, and olives.
Toss over medium heat, adding pasta water to create a light sauce.
Stir in half the basil. Taste and adjust seasoning.
Step 4 – Serve
Spoon into bowls, top with remaining basil and Parmesan.
Tips
Use any mix of summer vegetables—try aubergine, red onion, or yellow courgette. It makes the dish both visually appealing and flavourful when using a medley of summer veggies.
For a vegan version, skip the Parmesan or use a non-dairy alternative such as nutritional yeast. Nutritional yeast is a deactivated yeast and makes a great a great cheese substitute. We like to use Marigold Engevita with B12 Yeast Flakes when making this recipe vegan-friendly.
Make ahead: Roast vegetables in advance and store refrigerated.
Can I use other pasta shapes for this recipe?
Instead of using rigatoni for this dish, you can use any short tubular pasta, such as penne, ziti and paccheri. It’s important to use a tubular pasta shape for this dish as the hollow centre and ridges trap the delicious sauces and juices of the vegetables, ensuring a flavourful bite every time.
How do I make this pasta vegan or gluten-free?
To make this pasta dish vegan, you can remove the Parmesan topping, or substitute it for a vegan alternative such as nutritional yeast, cashews or lemon zest to counterpoint the rich, savoury flavours.
If you want to make this recipe gluten-free, you can swap the rigatoni with a ‘free-from’ brand, such as Salvo 1968 Rummo Gluten Free Mezzi Rigatnoi, which is made from corn and brown rice. You could also use legume-based pasta (such as chickpea or lentil) which offer a protein-rich taste.
How long does roasted vegetable pasta last in the fridge?
Roasted vegetable pasta can last up to 3-5 days in the fridge if stored in an airtight contained to maintain freshness. You can also store this dish in the freezer for up to 3-6 months.
Can I add protein to this dish (e.g. chickpeas, grilled chicken)?
Yes, you can add protein to roasted vegetable pasta. If you are a vegetarian, you can add cooked green lentils or kidney beans, which enhances the nutritional value, increases protein content and adds a hearty texture and flavour to the dish.
If you want to add meat to the dish, we recommend adding chicken to provide a protein boost, whilst introducing a mild and versatile flavour that pairs well with the sauce and roasted vegetables. You can also add fish, such as anchovies or sardines, to provide a strong umami flavour that can deepen the overall flavourful profile of the pasta dish. It also adds a healthy source of omega-3 fatty acids.
Serving Suggestions
Garlic breadSalt-baked Sea BassCrispy green leaf salad with lemon