‘The best way to increase flavour in a dish is to add spice…and it doesn’t have to be complicated!’ – Spice Kitchen.
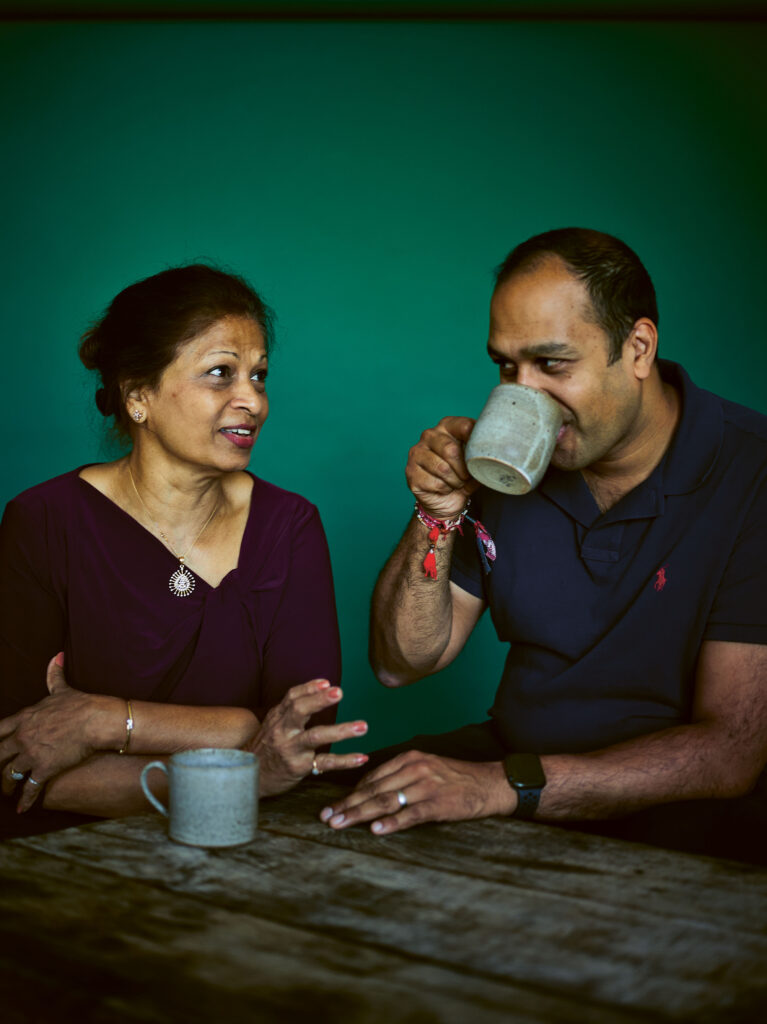
The faces behind Spice Kitchen are iconic mother and son duo, Shashi and Sanjay Aggarwal. The team specialise in producing small batches of freshly ground spice and tea blends from sourcing only the best, freshest raw ingredients across the globe. From this, they then hand-blend, roast and grind to authentic, delicious recipes in which are then sent on to customers.
Well known for their exquisite spice tins, there are various collections to choose from, including their iconic Indian Spice Tin and their Middle Eastern & African Spice Tin, each holding an assembly of 9 vibrant and gorgeously fresh spices that have been carefully selected to make recipes from the comfort of your home. It’s no surprise that due to the exceptional quality of the spices, Spice Kitchen has won 4 Great Taste Awards and went on to win the 2018 Gift of the Year Award!
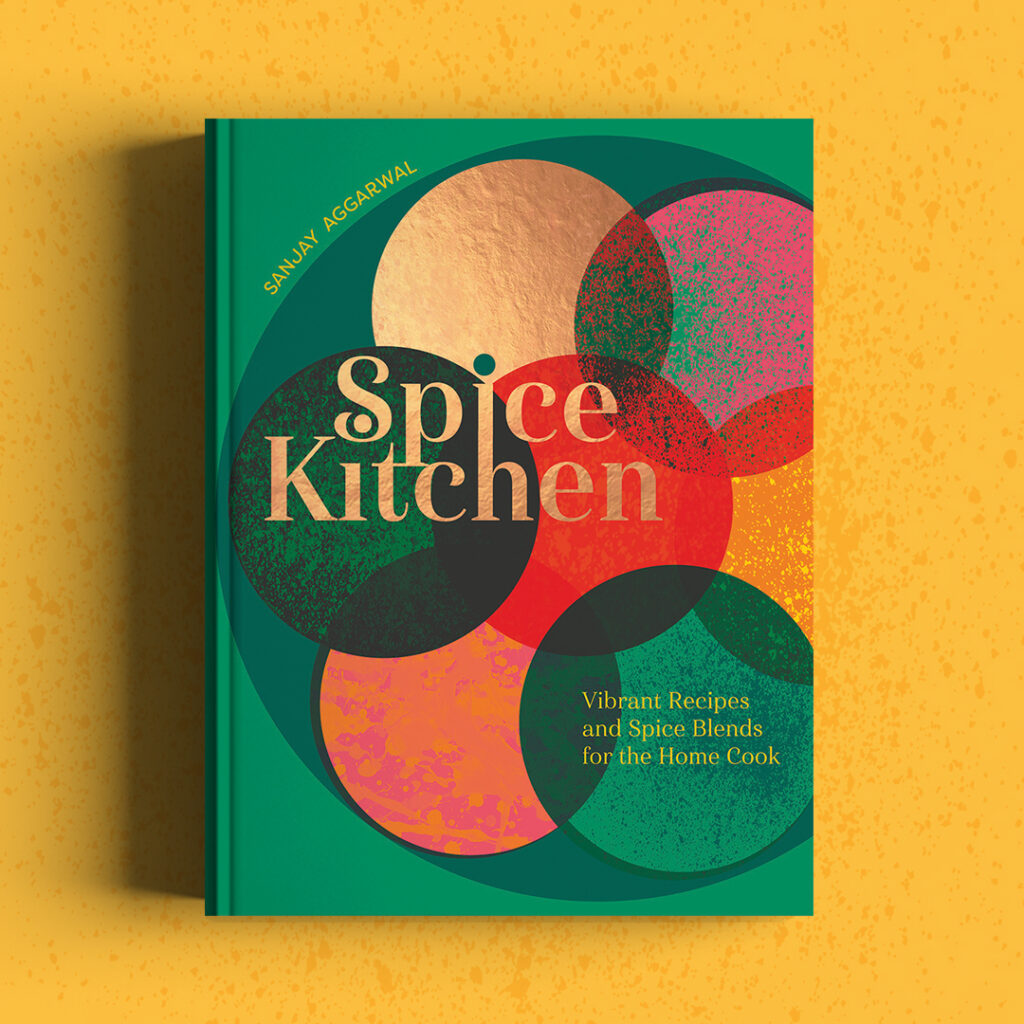
Spice Kitchen by Sanjay Aggarwal (Quadrille Books, £22) Photography by Dan Jones
We are delighted to team up with Spice Kitchen to delve into one of their tasty recipes from the team’s recent cookbook: ‘Spice Kitchen‘. The book is all about empowering you to become confident in cooking with spices and blends, showing you how to transform your mealtimes and add HUGE flavour from the use of one simple spice blend.
Sanjay wants to demystify the inner-panic that you may have around spices and blends, reassuring you that you do not need to waste time, invest in fancy equipment or stock a full cupboard on herbs and mixes to create a delicious dish…simply following the book will unlock you to cook a meal fuss-free and deliver on fantastic flavour!
Spice Kitchen by Sanjay Aggarwal (Quadrille Books, £22) Photography by Dan Jones
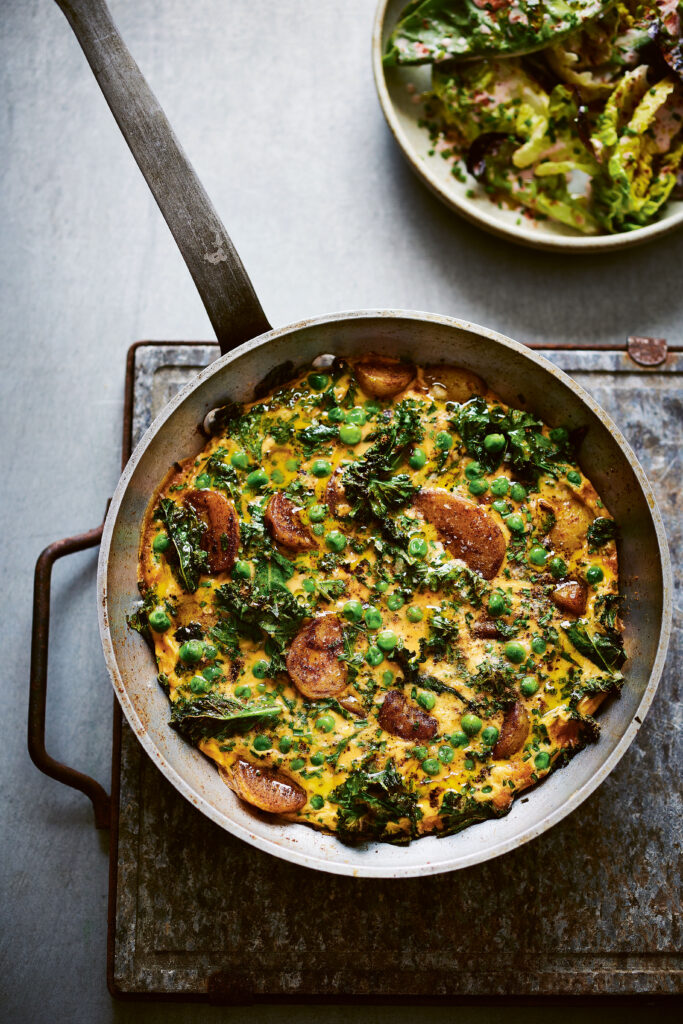
When we were exploring the book, we came across a delicious frittata recipe made from an infusion of vibrant curry spices and Maldon Salt to elevate the flavours to new heights. The frittata is also paired with a fresh, leafy salad to give that satisfying crunch as you take in your first bite.
Spiced Frittata with a Leafy Salad
Spice Kitchen by Sanjay Aggarwal (Quadrille Books, £22) Photography by Dan Jones
Sanjay makes this all the time with any potatoes left in the fridge after the weekend. It’s also a great lunch for the team at Spice Kitchen when they’ve got a busy day, because it serves a few and it really quick to throw together!
Serves: 4 people
Ingredients:
300g (10½oz) baby new potatoes
1 tbsp vegetable, sunflower or
rapeseed (canola) oil
1 tbsp Tandoori Masala (page 27)
100g (3½oz) kale (hard stalks
removed) and chopped
100g (3½oz) frozen peas
6 eggs
100ml (scant ½ cup) double
(heavy) cream
Generous pinch of Maldon Salt
1 tbsp chopped chives
For the Salad
3 tbsp Greek-style yoghurt
1 tbsp olive oil
2 tsp lemon juice
2 tsp Tandoori Masala (page 27)
200g (7oz) mixed salad leaves or
rocket (arugula)
Method:
Heat your oven to 180°C fan/200°C/400°F/gas mark 6.
Scrub the potatoes, add to a small saucepan and cover with cold water. Bring to the boil, then turn down to simmer for 10 minutes, until the potatoes can be pierced with a fork. Drain and set aside to cool a little.
Slice the potatoes in half or in thirds. Warm the oil in a frying pan (skillet), ideally one that can go in the oven, add the potatoes and sprinkle over the spice mix. Cook for a couple of minutes until everything smells gorgeously fragrant, then add the kale.
Continue to cook until the potatoes are crisp and golden at their edges and the kale is crisp but still vibrant green. Stir through the peas, then from from the heat. If you don’t have an ovenproof frying pan you can tip the vegetables into a baking dish once they’re cooked.
Beat the eggs with the cream, season with Maldon Salt, and add the chives. Pour over the vegetables and transfer to the oven.
Cook for 8 minutes until puffed and brown. Meanwhile whisk together the yogurt, olive oil, lemon juice and tandoori blend. Taste for seasoning.
Wash and dry the salad leaves if needed, then toss through the dressing.
Serve the frittata hot, in large slices, with the salad.
Spice Kitchen by Sanjay Aggarwal (Quadrille Books, £22) Photography by Dan Jones
Buy Your Very Own Copy Today!
With this book you can enjoy creating recipes from around the world! From the likes of a authentic Mamma Spice’s Dal Makhani, to a fiery blackened Cajun chicken feast, the ideas are endless and it showcases just how versatile spices can be!
Sanjay also shares his own top tips in making the spice blends from scratch, including classics from Garam Masala, Za’atar, Harissa and Tandoori.
You can purchase your very own ‘signed’ copy of Spice Kitchen Cookbook here, and begin transforming your mealtimes to culinary masterpieces!
Make sure you have your Maldon Salt ready for these recipes! If you are running out, please feel free to browse on our Where to Buy Page to find your nearest store in which stocks our beloved Maldon Salt.
Lastly, we LOVE seeing your creations – please tag us on Instagram using the #maldonsalt so we can share your own take on Spice Kitchen’s recipes!
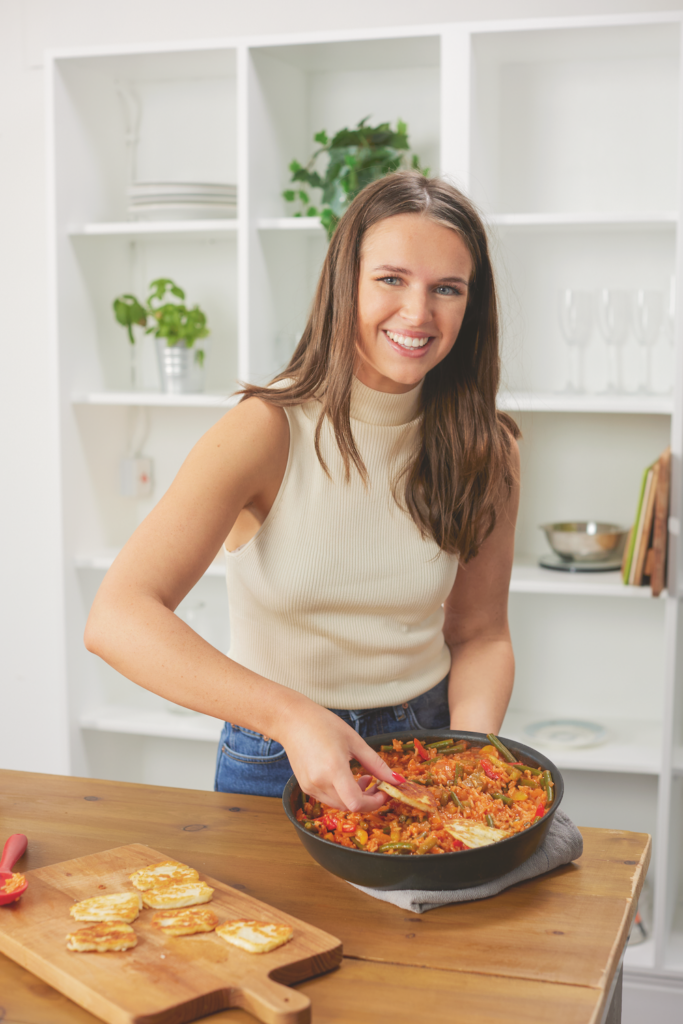
Mimi is a skilful recipe developer and content creator who is behind the popular platform, Beat the Budget. Her brand is motivated by her own experience of depending on cheap and unhealthy foods whilst studying at University because it was convenient. Mimi wanted to change her path, and begun creating a blog and Instagram presence online to provide more healthy and affordable alternatives that are delicious and not expensive to make!
As her culinary creations grew, so did Mimi’s success, where she now has over 270k followers on Instagram. Her tasty recipes have also been featured on likes of ASDA and Sainsbury’s Magazine.
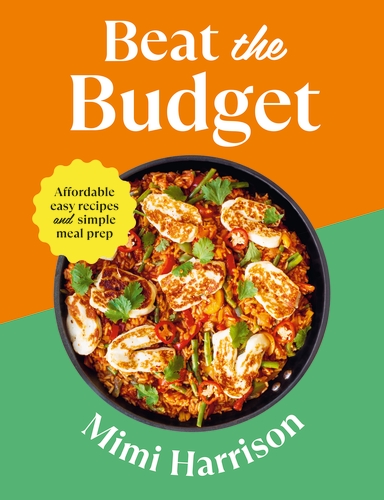
Excitingly, on 8th June Mimi released our debut cookbook: ‘Beat the Budget: Affordable Easy Recipes and Simple Meal Prep‘. The book’s mission is about proving that delicious food doesn’t have to be expensive and complicated and that you can achieve these results with the simplest of methods and ingredients.
With a collection of flavour-packed, fuss-free recipes to choose from, you can put down an amazing dish on the table without breaking the bank, which is why every recipe featured in the book comes at just £1.25 per portion! Chapters include easy breakfasts, soups and salads, one-pot wonders, fakeaways and sweet treats. What is also useful about this book is that Mimi shares her own tips and tricks on meal prepping and shopping lists, along with showcasing recipes that can be easily made with an air fryer or slow cookers to keep energy prices down.
In Conversation with Mimi Harrison
We were lucky enough to grab the chance in sitting down with Mimi and discuss all things surrounding how book and the inspirations behind it! Mimi even shared her top tips for people trying to budget when cooking, and her own personal favourite recipe from the book!
Mimi, it’s fair to say we are LOVING your debut cookbook ‘Beat the Budget’! Tell us, where did the inspiration to create affordable, easy recipes come from?
Thank you so much! That makes me so happy to hear. I started Beat the Budget (originally called Mimi Makes) at uni when I was struggling to balance healthy, delicious food with my new £20 weekly food budget. I felt like at the time, I could only find either cheap and unhealthy recipes or healthy and super expensive dishes, so I really wanted to start posting recipes that were balanced but also really affordable.
What are your main top tips for people trying to budget when cooking?
It’s all in the planning- spend around 20 minutes before you go shopping to plan out multiple recipes. I like to then write the shopping list according to the supermarket layout so you’re not walking back and forth, making impulse purchases. Also make sure you’re not hungry when you shop as this will cause you to throw all sorts into your trolly.
Cross-over ingredients- with more expensive ingredients, try and choose recipes where you can spread the cost of the ingredient over multiple recipes, which will reduce waste and cut costs. An example of this that I like to use is sharing a pot of crème fraiche- you can add a dollop to soup, loosen and drizzle over fajitas or use it as the base for a creamy pasta/risotto. All of these recipes feel really different whilst using the same ingredient.
Meal prep all the way- most of my recipes serve 4-6 servings which make them either ideal for a family or great for meal prep, hopefully making my book suitable for a lot of people! I save so much money on meal prepping as you’re spreading the costs over multiple dishes. What I love to do is select a freezable recipe, make a batch of it and then freeze half of the servings in individual containers. Overtime, you stock up on a variety of meals which will prevent boredom and make your meal prep more sustainable! I call this a freezer-cycle.
Slow cookers and air fryers are used in a few of your recipes, if you had to only choose one of the appliances, which one would you keep?
Ahh that’s such a hard one! I love them both but if I had to choose, I’d probably choose my airfryer as I love the crispy-ness that you can achieve with a minimal amount of oil. Oil is so pricey so I don’t just limit it for health reasons! I also want to steer clear of my oven at all costs when the weather is so hot like it is currently!
Meal prep advice is featured within the book, why do you think people should start meal prepping more?
As mentioned above, the savings you can make when meal prepping are obviously amazing. You can bulk buy bigger quantities of ingredients which will save you money but you also reduce waste as it’s easier to plan to use all of your ingredients up. With costs aside, meal prepping saves you so much time! I feel like if you can still eat delicious food that you won’t get bored of by implementing the freezer cycle, all the negatives of meal prepping can be eliminated.
There are so many recipes to choose from, come on, you must have a favourite?
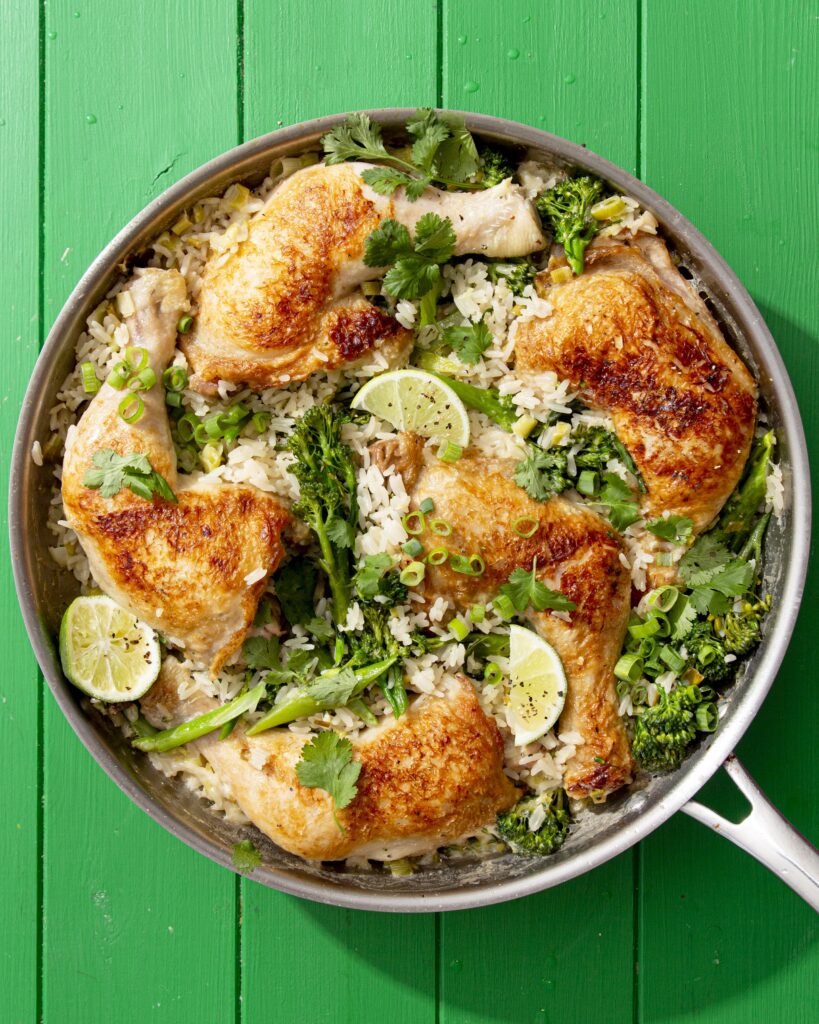
Ahhhh I can’t choose an absolute favourite as I love them all so much, but my favourite this week is my Ginger & Lime Chicken Legs with Coconut Rice. Chicken legs are the most underrated cut of meat- they’re even cheaper than chicken thighs! I love how it comes together in one pan and it’s really fresh whilst feeling hearty at the same time.
What does a normal day in the life look like for you Mimi?
I’m filming or testing recipes most days at the moment which is so much fun. I usually go for a walk/run with my dog & then head out to the studio to start prepping my ingredients for the day. At the moment I have to stop filming by around 2 o’clock as the studio gets too hot! So then it’s time to divide the food into meal prep containers and the rest of the day will be laptop/editing time.
Name 3 things in the kitchen you can’t live without!
My ninja possible pan- I use it everyday at least twice, the size and shape means that it’s perfect for cooking 4-5 servings at a time (which we love). You can also put it in the oven so that it reduces clean up by making a lot of one pot dishes!
My plastic bench scraper– I get so many questions about this in my reels! It’s a rectangular piece of plastic that helps you to scoop up any chopped vegetables in one sweep. It saves so much time with prep. You can get them for around a pound from Amazon!
My glass meal prep containers- they’re oven/microwave/air fryer proof which means that I can just chuck my meal prep directly into whatever appliance I need to reheat it. Also, they’re so sturdy that nothing is escaping/spilling out of them.
Ginger & Lime Chicken Legs with Coconut Rice
This is one of Mimi’s favourite recipes in the book. Not only is it one-pot, but is also requires minimal prep. She loves how comforting the meal is, yet every mouthful feels so fresh and vibrant with the zingy ginger notes and the kick of lime, contrasting with the creamy rice. Oh, and if you’re looking for the gains, this recipes has 60g of protein in it! Woohoo!
Serves: 5 people
Preparation Time: 5 minutes
Cooking Time: 40 minutes
Ingredients:
1 tbsp rapeseed oil
5 chicken legs, (about 1.1kg)
50 g spring onions, thinly sliced
4 garlic cloves, crushed
2 tbsp fresh ginger, peeled and finely grated
350 g rice, rinsed
750 ml chicken stock juice of ½ lime + wedges to serve
1 x 400 g can coconut milk
100 g tenderstem broccoli, florets sliced and stems thinly sliced
Set a deep pan over a medium heat and add the rapeseed oil. Season both sides of the chicken legs with salt and pepper, then place the legs skin-side down in the pan and leave to fry for around 15 minutes.
Rotate and cook the chicken legs for a further 15 minutes on the other side. The skin should be crispy and golden brown and the meat almost cooked through. Remove from the pan and set aside.
Add the spring onion to the same pan (reserving some of the greener ends for garnish) and add the garlic and ginger. Fry over a medium heat for a few minutes.
Add the rice to the pan and stir, then pour in the stock, lime juice and coconut milk.
Add the chicken legs back to the pan, skin-side facing upwards. Cover and leave to cook over a medium/low heat for18 minutes, adding the broccoli after eight minutes.
Garnish with the reserved green spring onion ends, lime wedges and fresh coriander and dig in!
Meal Prep Tip:
Separate portions of broccoli and coconut rice into sealed containers along with a cooked chicken leg in each container. Chill in the fridge for up to three days or freeze for up to three months. If eating from frozen, defrost in the fridge overnight. To reheat from chilled, heat in the microwave for two minutes on high. Top with the garnishes (stored separately) and enjoy!
Want to Create a Recipe From This Book?!
You can find where to purchase Mimi’s cookbook here and start whipping up easy yet delicious recipes for yourself and the family.
Make sure you have your Maldon Salt ready for these recipes! If you are running out, please feel free to browse on our Where to Buy Page to find your nearest store in which stocks our beloved Maldon Salt.
Lastly, we LOVE seeing your creations – please tag us on Instagram using the #maldonsalt so we can share your own take on Mimi’s recipes!
This refreshing cocktail is perfect for the warm summer months! We combine pink grapefruit and rosemary together as both compliment each other’s flavour profile perfectly.
Make sure to add a pinch of Maldon Salt your cocktail to enhance the sweetness and counteract the bitterness from the grapefruit. Salt also enhances the citrus in sours and adds both depth and texture when the soda water is incorporated into the drink.
You can serve this cocktail with many ‘picky’ bit dishes, including our delectable arancini balls filled with creamy mozzarella and parmesan. Additionally, we recommend pairing this cocktail with a bright, summery salad such as our classic Caprese salad made up with slices of fresh cheese, tomatoes and basil.
Here is how to make our Pink Grapefruit and Rosemary Spritz…
Fill a large spritz glass with ice.
Pour over the grapefruit juice, followed by the Aperol.
Next pour over the prosecco and then a final splash of soda water to top up the glass.
Add a pinch of Maldon Salt and give the whole glass a stir to combine.
Garnish with a slice of grapefruit and a sprig of rosemary.
Serve immediately and enjoy!
Our chicken noodle soup is the final recipe for using chicken three ways. We first cooked the whole chicken through spatchcocking it to create a deliciously succulent spatchcock BBQ chicken. From the leftovers, we then used roughly 100g of the chicken, shredding it to create a beautifully creamy chicken, leek and bacon pie that was topped with crispy filo pastry.
Now, with the chicken carcass left and the roughly 75g of chicken, we can make a soup full of fresh aromatics and flavours that will warm you up through the chillier days.
You can serve this soup with a side of homemade rosemary focaccia, oven baked until it is perfectly golden and crisp to mop up the final juices left in the bowl.
Here is how to make our Chicken Noodle Soup…
Begin by making your chicken broth. Make sure any remaining meat has been stripped from the chicken carcass and then place it in a large stock pot and cover with water (you want to add lots of water and then allow it to reduce down).
Add the onion, and one of the carrots roughly chopped. Then add 2 sticks of celery, roughly chopped. Add a pinch of Maldon Salt, black peppercorns and then the sprigs of parsley and thyme.
Place the pot onto the hob and bring to the boil. Once boiling reduce the temperature to a very low simmer and allow this to bubble away for 1 – 2 hours. Occasionally checking the water to make sure it hasn’t reduced to rapidly, adding more if needs be. If there is scum rising on the surface, make sure to skim this off.
After an hour or two you should be left with a wonderfully flavoursome broth or stock.
Drain the broth through a sieve and discard the carcass and vegetables. Set the clear broth aside.
To make the soup, start by cooking the angel hair pasta according to the packet instructions. Then drain, rinse off the starch, and set aside tossed in a little olive oil to stop it sticking together.
Place the clear broth back into a pan and bring to a simmer. Peel the carrot and then finely slice, along with the remaining celery. Place these into the broth and allow them to boil for a few minutes to cook. Add any leftover chicken to the broth now and the handful of kale or cavolo nero, cooking for a further minute.
Finally add the chopped parsley and check the seasoning, adding some more Maldon Salt or cracked black pepper if required.
To serve, arrange the angel hair pasta at the base of two bowls. Then ladle over the hot broth with vegetables and chicken.
Finally drizzle with some EVOO and serve.
Both delicious and hearty, this pie recipe is a comfort food classic which is loved by many family and friends. Being the secondary part to the series of using chicken three ways, we use roughly 100g of leftover chicken from grilling it in our within Spatchcock BBQ Chicken recipe.
We use a filo pastry for a lighter topping option, however you are welcome to use shortcrust pastry instead for a firmer option.
Here’s how to make our Chicken, Leek and Bacon Filo Pie…
Start by making the white sauce for your pie filling. In a large pan add 100g of butter and allow it to melt. When the butter begins to foam, add the plain flour and use a wooden spoon to stir it in and create a paste. Cook this for couple of minutes until it begins to smell biscuity.
Then take the pan off the heat and add a splash of the milk, use a whisk to immediately stir this in to avoid lumps. As soon as the milk is absorbed, add another splash making sure to whisk it in fully. Alternate doing this and placing the pan back on the heat to allow it to bubble and thicken between each addition. Keep going until all the milk has been added and you are left with a thick, creamy, and smooth sauce.
Turn the heat off the white sauce and stir in the wholegrain mustard, Maldon Salt and cracked black pepper to taste. Check the seasoning and then set aside.
In another pan, add the lardons and cook until they are beginning to turn crispy. Now add the sliced leeks and diced onions. Keep cooking these until they are fully softened and translucent.
Once the leeks and onion are soft, add the garlic and cook for a further couple of minutes. Then add the leftover shredded chicken and warm through.
Finally stir this mixture into the white sauce and add the chopped tarragon.
Preheat the oven to 180C Fan.
Take a small pie dish and pour the filling in.
Take one sheet of filo pastry at a time and lay it onto your board.
Brush both sides with the final 100g of melted butter, and then use your hands to scrunch the filo up and place on top of the pie filling. Continue to do this with the remaining filo sheets until the whole pie top is covered.
Place it into the preheated oven and bake for about 15 minutes until the filo is golden brown and crispy on top.
Remove from the oven and allow it to sit for a couple of minutes before serving alongside your favourite green vegetables.
To start off our series in using a chicken in three ways, we first cook a large chicken to make a delicious spatchcock BBQ chicken, a family favourite that is requested at most dinners during the summer.
With a cooking time of roughly 40 minutes on the outdoor grill, it’s a very easy, fuss-free recipe to follow that will certainly deliver in flavour. The best part is the marinade for the chicken, which is made with an infusion of gentle, warming spices like smoked paprika and chipotle paste to give a spicy kick to the meat. With a dash of runny honey and the juice of a lemon, the marinade is bought to a sweeter, zesty level.
Did you know spatchcocking is the method in which you split a whole chicken by removing the backbone so that it is completely flattened. This will reduce the cooking time significantly, which is ideal for wanting to cook in a much speedier fashion for your hungry guests!
Here is how to make our Spatchcock BBQ Chicken…
Start by spatchcocking the chicken. Place it on your board breast side down and the legs at the bottom facing towards you. Use a pair of sharp scissors start at the end with the parson’s nose and then cut either side of the backbone all the way up so you remove it completely.
Then flip the chicken over and use your hands to press down on the breastbones and legs to snap the small bones and flatten the chicken out.
Now prepare the marinade by mixing together the olive oil, garlic, smoked paprika, cumin, chipotle paste, runny honey and lemon juice. Season this well with Maldon Salt and cracked black pepper.
Place the spatchcock chicken on a large tray and the coat it well with the marinade, making sure it gets into all the cavities and is evenly coated.
Leave this to marinade for at least 30 minutes, but can be left overnight in the fridge too.
When you are ready to cook your chicken, heat up the BBQ. The best way to ensure even cooking is to cook the chicken skin side up on the indirect coals for approximately 20 – 30 minutes. Then turn the chicken and place it on the hot coals skin side down for about 10 minutes until the skin is nice and crispy. This really does depend on the heat of your BBQ so make sure to keep an eye on it.
If you aren’t using a BBQ you can simply cook the chicken in the oven at 180C for 15 minutes and then place under the grill for a further 10 to crisp up the skin. A spatchcock chicken cooks much quicker than a whole chicken.
Serve the chicken alongside your favourite side dishes – we’ve done chips and salad. It also goes well with garlic aioli mayonnaise.
Keep your leftover chicken for the next couple of recipes and make sure to reserve the chicken carcass.
You only need a handful of ingredients to make our beautifully soft and creamy potato salad, the perfect side dish for your summer BBQ’s this year!
It’s fair to say, a good potato salad always starts with using the right variety of potatoes. The best potato to use for your salads are named ‘waxy potatoes’. These are low in starch yet hold a high sugar and water content. As a result, they tend to hold their shape more when they are cooking, and are notable less grainy than more starchier potatoes, like russets or Idaho’s. Therefore, we opt in using red potatoes for our salad, as they are best for boiling and maintain their soft, fluffy centre which is ideal for making a creamy potato salad.
When boiling your potatoes, make sure to add a pinch of Maldon Salt to the water. This is vital for a well-seasoned potato salad because when the starch in the potatoes begins to warm up from boiling, they will begin to open and absorb water, causing them to loose shape. Salting the water will allow the starch cells to close off, preventing the potatoes from becoming too soft and allowing them to maintain shape with a fluffy centre.
We recommend serving your potato salad with BBQ classics, including juicy burgers, delicious smoky chicken or perhaps as a topper to ‘bulk’ up a beautiful British Salad.
Here’s how to make our creamy potato salad…
Start by placing the red skinned potatoes in a large pan and filling it with water, lightly salt it and place it on the hob.
Bring to the boil and allow the potatoes to simmer for around 5 minutes until just tender but still holding their shape.
Drain the potatoes and allow to cool.
Once the potatoes are cool, cut them into quarters or halves depending on size. Place into a large bowl and mix together with the mayonnaise, capers, chives, dill, Maldon Salt and black pepper and lemon zest. Make sure everything is well coated but try not to break up the potatoes.
Transfer the potato salad onto a serving platter and garnish with some final sprinkling of herbs and a pinch of Maldon Salt.
This can be served straight away or kept in the fridge until serving. It can stay in the fridge for up to 5-days, if stored properly and securely.
Simple yet refreshing. Our cucumber salad recipe is quick and easy to make within a matter of minutes…perfect for the summer!
When choosing your cucumber, we recommend using a seedless variety. English cucumbers are great for this as they are long, slim and hardly have any seeds. You can also opt for Persian cucumbers, however they are notably shorter in comparison to English cucumbers.
Pair this salad with summertime classics, including juicy burgers and chargrilled chicken on the BBQ for that perfect cool contrast from the warm meats.
Finely slice the cucumber. In a bowl, toss the cucumber slices with Maldon Salt and a small pinch of sugar. Let this stand for roughly 5 minutes.
Add the cucumber to a large bowl with the red onion, white wine vinegar, Maldon Salt and cracked black pepper.
Transfer onto a serving plate and garnish with dill sprigs and Maldon Salt before serving.
This quick and easy edamame recipe is perfect as an appetizer for your dinner party. Seasoned generously with Maldon Salt, these beans are crunchy and seriously addicting to eat, especially if you have a side of soy sauce and lemon wedges to add a hit of citrus to the dish.
You can serve edamame beans with many other dishes, including a delicious prawn pad thai. The edamame bean has a faint pea almost buttery taste with a hint of sweet nuttiness to it, which compliments the sweet-savour fusion of the pad thai.
Here is how to make our salted edamame beans…
Place a large pan of water on to boil.
When simmering, add the frozen edamame beans and blanch for 5 minutes until bright green and cooked through.
Drain the beans from the water and place in a large serving bowl, sprinkle generously with Maldon Salt.
Serve immediately with soy sauce for dipping and lemon wedges.
Everyone needs to have a classic chocolate chip cookie recipe in their possession, and we wanted to share ours with you!
Follow this easy, fuss-free recipe to have deliciously soft biscuits that are perfectly buttery and sweet at the same time.The secret ingredient is to add a generous pinch of Maldon Salt to your cookies in the dry mix and as a final sprinkling for when they have baked.
Salt is a important component when baking, as it not only elevates and balances out the flavour of your cookies, but it’s vital for gluten structure and browning.
If you enjoy making these classic chocolate chip cookies, why not try our indulgent pistachio and dark chocolate cookies, perfect to make for your friends and family! Additionally, if you enjoy baking ‘lighter’ options, we have a delicious healthy cookie recipe which is perfect with a nice cup of tea on the side.
Place the softened butter and sugars into the bowl of a stand mixer and beat together until pale and fluffy. Add the vanilla extract and egg and beat again.
Sift in the plain flour, baking powder and Maldon Salt and mix again. Finally stir through the dark chocolate chunks until well incorporated.
Line two baking trays with baking parchment.
Make 25 equal balls of the cookie dough and space them out on the trays, leaving some space between then. Gently press the cookies down so they are a thick disc shape. Place them into the fridge overnight to rest – this step really helps with the texture of the cookie, if you are pushed for time, you can place the trays into the freezer for 30 minutes instead.
When you are ready to bake the cookies, preheat the oven to 180C fan. Place them into the warmed oven for 10 – 12 mins until lightly golden.
Remove from the oven and allow to cool on a wire rack.
Serve the cookies with an extra sprinkle of Maldon Salt.