Discover how to make raspberry flapjacks with a jammy fruit layer and perfectly chewy oats. This easy traybake recipe uses golden syrup, light muscovado sugar, and a pinch of Maldon Sea Salt to balance the sweetness—ideal for lunchboxes, bake sales, or a cosy afternoon tea.
Cook the Raspberry Layer
Add raspberries, lemon juice, and caster sugar to a medium saucepan.
Cook over medium heat for 15 minutes, stirring, until berries break down and juices thicken to a jammy consistency.
Spread on a lipped tray to cool completely; it will thicken further as it cools.
Make the Flapjack Base
Line a 20cm square tin with parchment paper. Preheat oven to 170C fan.
Melt butter, light muscovado sugar, and golden syrup over low heat until sugar dissolves.
Remove from heat, stir in rolled oats and a good pinch of Maldon Sea Salt until evenly coated.
Layer & Bake
Press two-thirds of the oat mixture into the tin to form an even, compact base.
Spread the cooled raspberry mixture evenly on top.
Dot over the remaining oat mixture in clumps to create a pebbled topping.
Bake in the middle of the oven for about 30 minutes until golden at the edges.
Cool, Chill & Slice
Allow to cool completely in the tin.
Chill for 1 hour to set, then lift out and slice into bars or squares.
Tip: For neat edges, use a long serrated knife and wipe between cuts.
Tips & FAQs
Tips
For chewier flapjacks: don’t overbake; remove when edges are golden and centre still feels soft.
Oats: rolled or jumbo oats give the best texture; avoid instant oats.
Flavour boost: finish with a light sprinkle of Maldon Sea Salt flakes once cooled.
Faster cooling: 20–30 minutes in the fridge helps set clean slices.
Festive twist: add vanilla, orange zest, or a white chocolate drizzle; top with freeze-dried raspberries.
FAQs
Can I use frozen raspberries?
Yes. Cook from frozen; extend the jammy cooking stage by a few minutes to evaporate excess liquid.
How do I keep flapjacks chewy?
Bake until just golden at the edges, cool fully, then chill before slicing. Store airtight to retain moisture.
What’s the best oat for flapjacks?
Rolled oats (or a mix of rolled and jumbo) for a chewy, nubby texture; avoid instant oats which can turn pasty.
Can I make these vegan?
Yes—swap butter for a plant-based block butter (not spread) in equal weight.
Can I use raspberry jam instead?
You can, but use a thick, high-fruit jam and warm it slightly so it spreads in a thin, even layer.
Serving Suggestions
Serve as afternoon tea squares, picnic bars, or festive traybake bites.
For extra contrast, finish with a light dusting of Maldon Sea Salt flakes or a drizzle of melted white chocolate.
Cut into 16 squares for standard portions, or 25 small bites for party platters.
Storage & Reheating
Room temperature: Airtight container up to 3–4 days.
Fridge: Up to 1 week; bring to room temp before serving for best chew.
Freeze: Up to 2–3 months, well wrapped. Thaw overnight in the fridge or 1–2 hours at room temp.
Re-crisp edges: Briefly chill to firm before slicing; avoid reheating which can dry them out.
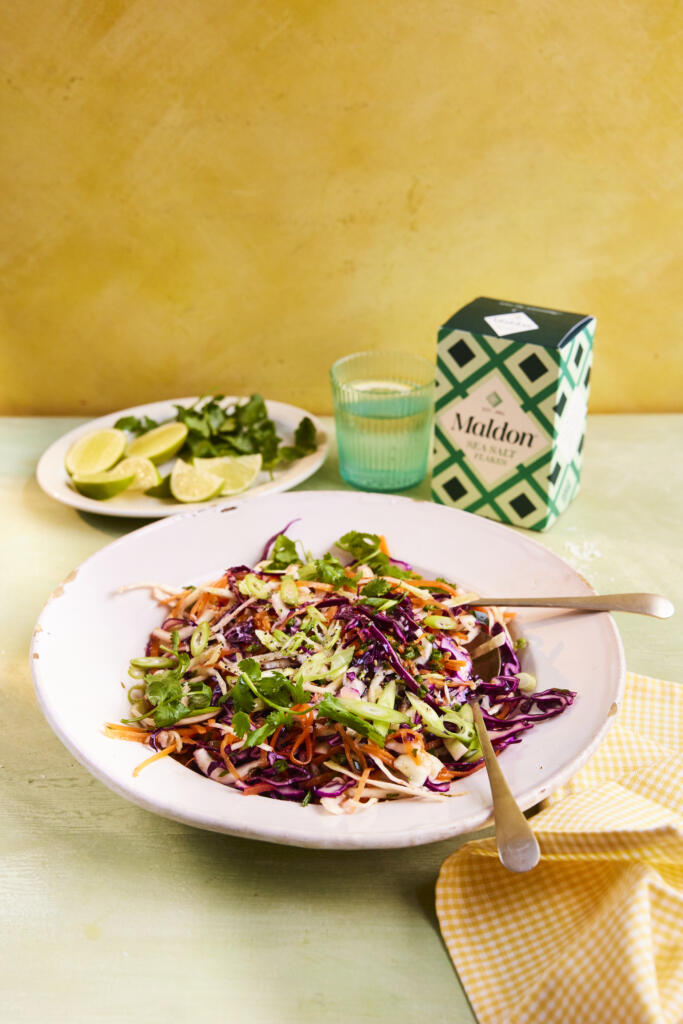
Brighten up any meal with this lime and coriander cabbage slaw! Packed with crunchy cabbage, sweet carrots, fresh coriander, and a zesty lime dressing, this healthy side dish is a perfect addition to summer picnics, BBQs, or taco nights. Quick to prepare, naturally vegan, and bursting with flavour, this easy slaw recipe will become your go-to for fresh salad ideas.
How to Make Lime and Coriander Cabbage Slaw
Step 1 – Prepare the Vegetables
Thinly slice the cabbage, julienne or grate the carrots, finely chop jalapeño, spring onions, and coriander.
Step 2 – Make the Dressing
In a small bowl, whisk together lime zest, juice, olive oil, maple syrup/honey, and sea salt.
Step 3 – Assemble and Toss
In a large bowl, combine cabbage, carrots, jalapeño, most spring onions, and coriander. Drizzle with dressing and toss to coat.
Step 4 – Serve
Scatter reserved spring onions and coriander on top before serving. Taste and adjust seasoning if needed.
Tips
Use a mix of red and white cabbage for extra colour.
For extra crunch, add toasted seeds or nuts.
Make ahead: Prep veggies and dressing separately, combine just before serving.
Can I make cabbage slaw ahead of time?
Yes, you can make cabbage slaw ahead of time. Martha Stewart actually recommends making slaw ahead of time so that the flavour intensifies. You can prep the vegetables and dressing separately for up to a day ahead, refrigerating for up to 3 hours.
How long does cabbage slaw last in the fridge?
You can store cabbage slaw in the fridge for up to 3-5 days. However, we recommend eating it within a day or two for the best results in flavour and texture. This is because it can become watery if kept for longer, making it unpleasant to eat.
Is this slaw recipe vegan and gluten-free?
Yes, this cabbage slaw recipe can be vegan and gluten-free friendly depending on the ingredients used.
The base ingredients for the slaw (the vegetables) can remain the same, however you would need to swap the honey in the dressing mix with pure maple syrup instead to make it 100% vegan. We like to use Biona Organic Pure Maple Syrup Amber Grade A 1 for this recipe.
Can I use lemon instead of lime?
Yes, you can use lemon instead of lime, but it will alter the flavour slightly. This is because lemons have a sweeter, less tart flavour than limes.
Serving Suggestions
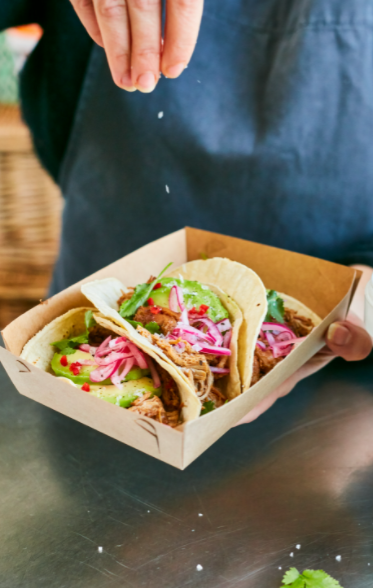
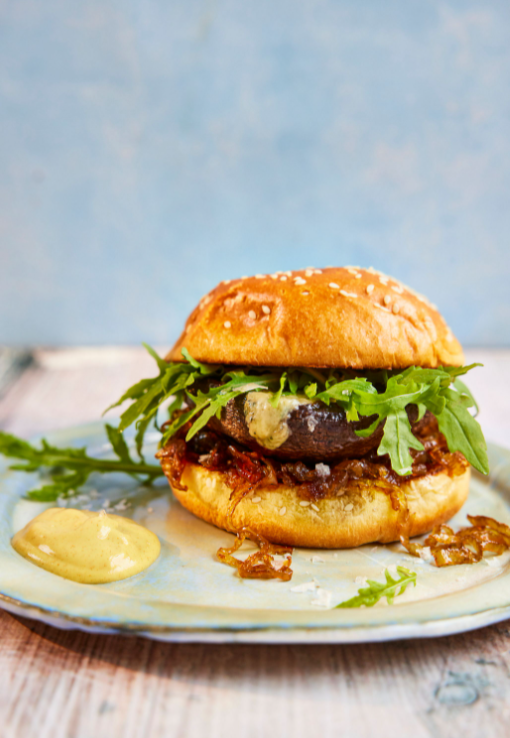
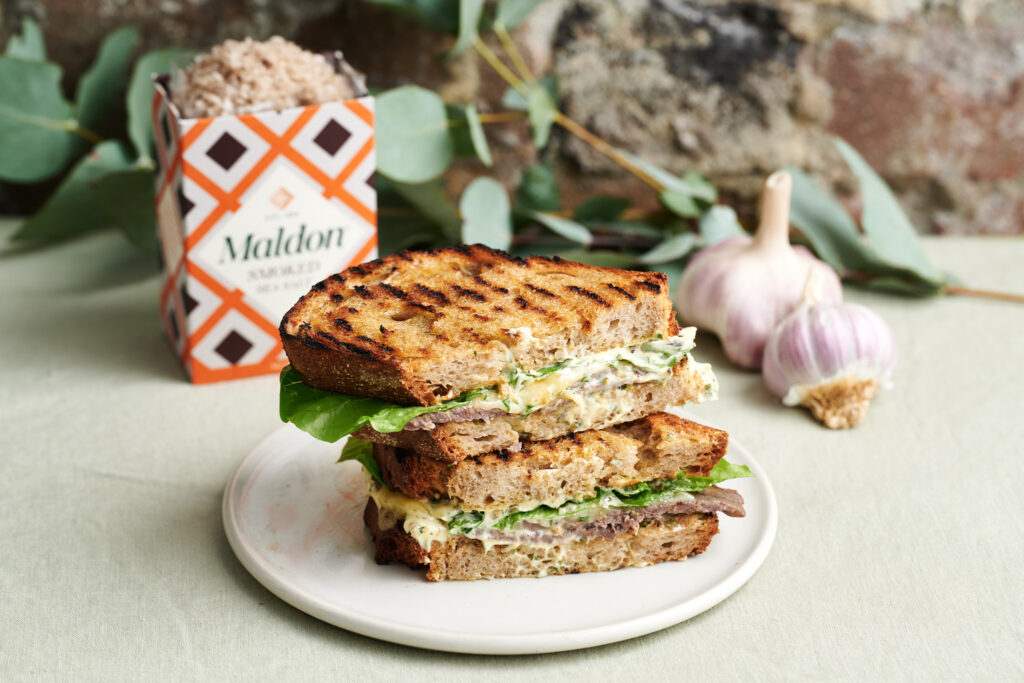
TacoMushroom BurgerClub Sandwich
Perfect with tacos, grilled meats, burgers, or as a BBQ side.
Add to wraps, sandwiches, or bowls for extra crunch and flavour.
Storage & Reheating
Store in an airtight container in the fridge for up to 3 days.
For best texture, keep dressing separate until ready to serve.
Refresh with extra lime juice if needed.
If you try this lime and coriander cabbage slaw recipe, let us know in the comments or submit your own recipe using this slaw! For more fresh salad ideas, check out our full collection.
Use a peeler to remove strips of peel from the lemons, avoiding the white pith. Put the lemon peel, sugar, 400ml water and a pinch of Maldon Sea Salt in a medium saucepan. Cook over a gentle heat until the sugar has fully dissolved. Remove from the heat and leave to cool.
Pour the syrup through a strainer. Discard the peel.
Juice the lemons and add the juice to the syrup. Mix well and transfer to a large jug. Add plenty of crushed ice and top up with sparkling water. Serve with lemon slices and fresh mint.
If using wooden skewers, soak in water for at least 30 minutes before you plan to BBQ/griddle.
Mix the marinade ingredients in a large bowl.
Cut each halloumi block into 8 large chunks. Thinly slice the courgettes lengthways to about 3mm thick, ideally with a mandolin (go carefully!) or with a sharp knife. Halve and de-stone the nectarines then cut each half into 4 chunks.
Toss the halloumi chunks, courgette strips and nectarine chunks in the marinade. Thread everything onto the skewers, alternating between chunks of halloumi, pieces of nectarine and courgette slices (thread these on in squiggly S shapes). Set aside on a tray or plate as you preheat the BBQ or griddle pan.
Cook on the BBQ or griddle pan until nicely charred on both sides of the halloumi chunks. Transfer to a platter, scatter with mint leaves and drizzle with honey. Serve with lemon wedges.
Tip the flour in the bowl of a stand mixer. Put the yeast on one side of the bowl and the Maldon Sea Salt on the other (this separation prevents the salt from killing the yeast). Put the mixer on low to evenly distribute the dry ingredients.
With the motor running, pour in 3 tbsp olive oil, followed by 350-370ml water. Add the water gradually until you have a slightly sticky dough (you may not need the full 370ml).
Leave the mixer running on a medium speed to knead the dough for 7-10 minutes until the dough is coming away from the sides of the bowl and feels stretchy when pulled. Transfer the dough to a clean bowl, cover with a tea towel and leave to prove for an hour or so until doubled in volume.
Grease a rectangular, shallow tin (about 25cm x 20cm) with olive oil. Gently tip the dough into the tin and use your fingertips to stretch the dough towards the edges of the tin. Cover with the tea towel and leave to prove for another 30-45 minutes.
Preheat the oven to 200C fan. Press your fingers into the dough to make dimples, scatter with rosemary leaves and drizzle with 3 tbsp olive oil. Bake for 35-40 minutes until golden. As soon as the focaccia comes out of the oven, drizzle with a final 2-3 tbsp olive oil. Sprinkle with Maldon Sea Salt and cut into squares.
This cherry tomato tarte Tatin is a delightful twist on the classic French dessert, reimagined as a savoury dish bursting with rich, caramelised flavours. Juicy cherry tomatoes are slow-cooked in a buttery glaze and finished with a flaky puff pastry crust, creating a perfect balance of sweetness and and savoury.
The addition of Maldon Garlic Sea Salt flakes elevates the tarte, infusing it with a subtle garlicky depth and enhancing every bite with a delicate crunch of mineral-rich sea salt flakes. Ideal as a light lunch, appetiser, or elegant side, this tarte is an impressive as it is easy to make.
Here is how to make a cherry tomato tarte Tatin
Preheat the oven to 200C fan.
In an ovenproof pan, about 23cm in diameter and preferably cast iron, warm the olive oil over a medium heat. Add the cherry tomatoes and season with Maldon Garlic Sea Salt. Stir to coat in the oil and cook for 10 minutes or so, stirring every so often, until the tomato skins have split. Transfer to a plate.
Return the pan to a medium heat, add the balsamic vinegar and honey. Simmer for a minute or so to create a syrupy mixture then immediately remove from the heat. Return the cherry tomatoes to the pan, leaving behind any juices that have collected on the plate, and arrange in a single layer. Tuck sprigs of thyme between the tomatoes then lay the pastry over the tomatoes, tucking it around the tomatoes at the edge.
Prick the pastry with a fork in a few places then bake for 25-30 minutes until the pastry is golden brown. Leave to settle for 5-10 minutes then run a knife around the edge to loosen the pastry. Place a large plate on top of the pan and, moving quickly and confidently, invert the tarte Tatin onto the plate. Sprinkle with Maldon Garlic Sea Salt to serve.
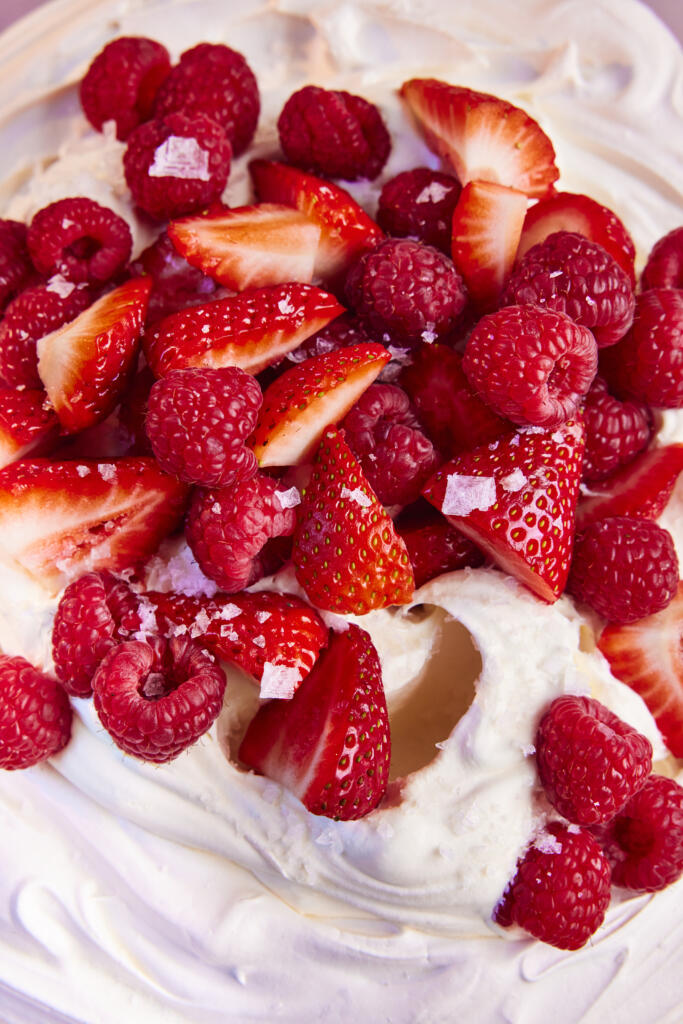
There’s nothing quite like a summer pavlova to crown a sun-drenched afternoon – crisp on the outside, marshmallow-soft within, and generously topped with clouds of whipped cream and a riot of fresh berries. This fruit pavlova, kissed with vanilla extract and finished with a delicate sprinkle of Maldon Sea Salt flakes, bring together the finest elements of warm-weather indulgence.
How To Make Summer Fruits Pavlova
To make this summer pavlova truly shine, preheat the oven and prepare your baking trays with baking parchment. After shaping the meringue into a generous nest, reduce the temperature once it goes in – the secret to that perfect balance of crisp shell and soft centre. Resist the urge to peek; leave the oven door closed as it baked and cools completely inside. Once cooled, top with cream whipped to soft peaks. You can also add a touch of icing sugar for extra sweetness. Pile on fresh summer berries – strawberries, raspberries and blueberries – crowning it all with a final flourish of Maldon Sea Salt flake. Why add salt to a pavlova? The salt enhances the sweetness of the cream and fruit, elevating this classic dessert into something both elegant and unforgettable in flavour.
Step 1 – Prepare the Oven and Baking Sheet
Preheat the oven to 130°C fan. Line a large baking sheet with parchment paper.
Step 2 –Whisk the Egg Whites
Using a stand mixer, whisk the egg whites on medium-high speed until they form soft peaks.
Step 3 – Add Caster Sugar Slowly
Lower the mixer speed. Add the caster sugar, one spoonful at a time, allowing a little time between additions for the sugar to dissolve.
Step 4 – Whip to Stiff Peaks
Once all the sugar is added, increase the speed to medium. Whisk for at least 10 minutes until the meringue is thick, glossy, and forms stiff peaks. Check by rubbing a little between your fingers—if it feels gritty, keep whisking.
Step 5 – Add Cornflour and Vinegar
Mix the cornflour and white wine vinegar in a small bowl. Add a dollop of meringue, mix well, then fold this back into the main meringue mixture.
Step 6 – Shape the Meringue
Spoon the meringue onto the lined baking sheet and shape into a round about 25cm in diameter, with a shallower middle and taller edges.
Step 7 – Bake
Bake for 10 minutes at 130°C fan, then reduce the oven to 100°C fan and bake for a further 80 minutes. Turn off the oven and allow the pavlova to cool inside for at least 2 hours or longer.
Step 8 – Whip the Cream
Just before serving, whisk the double cream and vanilla extract to soft peaks.
Step 9 – Assemble and Serve
Fill the pavlova with whipped cream, top with fresh summer berries, and finish with a pinch of Maldon Sea Salt.
Pairing Suggestions
Sparkling Wine or Champagne – A dry sparkling wine, such as Brut Champagne or Prosecco, compliments the sweetness of the summer fruits pavlova and cuts through the richness of the fresh whipped cream.
Elderflower Cordial or Iced Tea – For a non-alcoholic options, try serving the pavlova with chilled elderflower cordial or a lightly sweetened iced tea with lemon and mint.
Mint or Basil Garnish – Fresh mint or thinly sliced basil leaves add a refreshing herbal note and a beautiful pop of colour against the red berries.
Stone Fruits – Depending on the season, add sliced peached, nectarines, or apricots to the berry mix for added depth and juiciness.
Flavoured Cream – Try infusing the fresh whipped cream with a hint of rosewater or orange blossom for a delicate floral note.
Serving Suggestions
Serve on a Cake Stand – Elevate the pavlova on a wide cake stand or rustic wooden board for a centre-piece worthy display at a dinner party.
Individual Pavlovas – For more formal gatherings, such as weddings or anniversary dinners, make mini pavlovas and serve individually, topped with fresh cream and a curated mix of berries.
Whipped-to-Order Cream – To maintain the perfect fluffy texture, whip the cream just before serving and dollop generously.
Storing and Reheating Your Pavlova
With the right storage, your summer fruits pavlova can remain light, crisp and celebration-ready for your party – even a day or two after baking! Here is how…
Meringue Base
Cool completely – Always allow the pavlova to cool completely in the oven with the door slightly ajar to prevent cracks caused by sudden temperature changes.
Airtight storage – Once cool, store the meringue base in an airtight container at room temperature. Keep it in a cool, dry place – not the fridge! This will add moisture to the meringue and cause sogginess, you want the base to be dry and crisp. For best texture, use the meringue base within 1-2 days of baking.
Drying out soft meringue – If your unassembled pavlova base has gone slightly soft due to humidity, you can ‘re-crisp’ it by placing in a preheated oven at 120°C for 15-20 minutes, then turning the oven off and letting it cool completely inside with the door adjar.
Assembled Pavlova
Refrigerate – If your pavlova is already topped with cream and fruit, cover it loosely with plastic wrap or a cake dome and store in the fridge. It’s best eaten within 6-8 hours to preserve the crispness of the shell. Please note, once you have topped your meringue with cream and fruit, the meringue will begin to soften, becoming more marshmallowy in texture.
Reheating – Do not reheat a pavlova that has already been topped with cream and fruit – it will collapse and become mushy!
Pro Tips When Making Pavlova
Use room temperature egg whites – You should always use room temperature egg whites when making a pavlova (or meringue) because they whip up faster and create a greater volume compared to cold egg whites, which are harder to whip up and don’t achieve the same level of fluffiness. Using room temperature egg whites will make the pavlova more staple and airy in texture.
Don’t rush adding sugar – Make sure the egg whites have been whisked to soft peaks before you add in your sugar. If you add in the sugar to soon and quickly, you won’t get an airy foam structure that you need for a thick and stable meringue.
Fully cool the meringue in the oven – Cooling the meringue in the oven after baking helps it to dry out evenly, leading to a crispier outer shell and softer, mashmallowy centre. You need to fully cool down the meringue in the oven to prevent it from cracking and ensure the structure is firm enough to hold the fresh whipped cream topping and medley of fruits.
Assemble just before serving – Assembling a pavlova before serving ensures the meringue remains crisp, the cream doesn’t become soggy, and the fruit is fresh. Moisture from the fresh whipped cream and berries can soften the meringue over time, create a soggy, unpleasant texture.
Separate components – If making ahead, keep the meringue base, whipped cream, and fruit separate until just before serving.
Avoid moisture – Always use dry utensils and containers when handling meringue to preserve it’s crisp texture.
How long do pavlovas last?
Once assembled with fresh whipped cream and fruit, pavlovas can be eaten within 1-2 days. When storing your pavlova, find somewhere that has no moisture and humidity. Do not store in the refrigerator, as this can cause the meringue to absorb moisture and become very soggy!
How do you stop a pavlova from cracking?
To prevent your pavlova from cracking, bake it at a low and consistent temperature, allowing it to cool slowly in the oven. This slow cooling process helps prevent the outer shell from hardening too quickly, which can cause cracks and an unstable structure.
Is pavlova gluten free?
Yes, a pavlova is naturally gluten-free! The core ingredients are egg whites and sugar, which are both gluten-free.
Can you freeze pavlova?
You can freeze the meringue shell of a pavlova by wrapping it tightly in plastic wrap or in an airtight container. This will last for a bout 1 month in the freezer. Although you could also freeze an assembled pavlova (topped with cream and fruits), the filling and decorations will become very soggy in texture and lose it’s delicious appearance.
When defrosting a pavlova, it’s recommended to thaw at room temperature for 5-7 hours, or in the fridge for 11-12 hours. Once defrosted, eat as soon as possible.
Why has my pavlova sunk?
If your pavlova has sunk or become flat, it is possible you have overbeating the egg whites, causing them to no longer hold air and will deflate during baking. Additionally, if your pavlova doesn’t reach 80°C , the marshmallow centre won’t fully be cooked and will collapse. Thirdly, undissolved sugar can attract moisture, making the meringue weep and potential to collapse. To avoid this, make sure the sugar is fully dissolved by rubbing a portion of the meringue mixture between your fingers; if you can feel any sugar granules, continue whisking!
Can you cook pavlova in the air fryer?
Yes, you can make pavlova in an air fryer. The air fryer method can significantly reduce the cooking time.
Heat the air fryer to 120°C. Line the air-fryer basket with baking parchment.
Make your meringue mix, which is made up of egg whites, sugar, cornflour, vinegar and vanilla extract.
Spoon out the meringue mixture onto the parchment and create a mount of meringue with a dip in the centre to hold the filling later.
Bake for 20 minutes. Reduce temperature to around 100°C. Bake for a further 1 hour, 15 minutes until the meringue is crisp on the outside. Turn off the air fryer, leaving the pavlova inside to cool completely.
Carefully lift out the meringue and put on a platter or plate.
Before serving, top with fresh whipped cream and fruit and a pinch of Maldon Sea Salt flakes.
Can you make pavlova without sugar?
Yes, you can make pavlova without sugar by using sugar alternatives such as erythritol or monk fruit.
Erythritol is a type of sugar alcohol, a naturally occurring sweetener found in some fruits and fermented foods. It’s a low-calorie sweetener and sugar substitute, around 70% as sweet as sugar.
Monk Fruit is a naturally occurring sweetener with a more intense sweetness than sugar. It’s often combined with erythritol for better results.
Tried this pavlova recipe? Let us know in the comments below! For more dessert recipes, visit our full collection.
Few things capture the flavour of summer quite like a juicy BBQ beef burger, hot off the grill, smoky and sizzling under the sun. Whether you’re firing up the barbecue for a weekend treat, planning a picnic, or hosting a casual garden get-together, this homemade burger recipe delivers series crowd-pleasing flavour.
Made with tender ground beef and seasoned generously with Maldon Sea Salt flakes and freshly cracked pepper, these beef patties are grilled to perfect over high heat until charred on the outside and juicy on the inside.
The real magic, though, comes in the layering – these BBQ beef burgers are topped with sharp, tangy quick-pickled red onions and a creamy, smoky spicy mayo with pickles, giving every bite a perfect balance of heat and zing. Serve them up in toasted buns with a slick BBQ sauce, crisp lettuce, and all your favourite toppings for the ultimate grilled burger experience.
How to Make Summer Beef Burgers
Quick and easy to make, this BBQ burger recipe is build around simple, bold ingredients like beef mince, olive oil and Maldon Sea Salt – proof that a great homemade burger doesn’t need much to shine.
Step 1 – Make the Quick-Pickled Onions
Toss and lightly scrunch the onions with the vinegar and a pinch of salt of Maldon Sea Salt. Set aside to soften and turn bright pink as you get on with the burgers.
Step 2 – Prepare the Burger Patties
In a large bowl, mix the beef mince, finely chopped onion, beaten egg, a good pinch of Maldon Sea Salt and pepper.
Step 3 – Shape and Chill the Patties
Using wet hands, divide the mixture into four balls, then lightly press each ball down to create patties about 5cm thick. Transfer the patties to a plate and leave to chill in the fridge for 30 minutes, or until you’re ready to cook.
Step 4 Make the Spicy Pickle Mayo
In a small bowl, mix the mayonnaise with a dash of hot sauce and the finely chopped gherkins. Taste for seasoning and add a dash more hot sauce if you’d like more heat.
Step 5 – Cook the Burgers
Heat your BBQ or griddle pan to medium-high. Brush patties with olive oil, then add to the grates or pan. Press down lightly with a spatula. Cook for 4–5 minutes until well browned, then flip and cook for 3–5 minutes more. Add cheddar slices after flipping if desired.
Step 6 – Toast the Buns
Transfer cooked burgers to a plate to rest for a couple of minutes. Toast the burger buns, cut side down, on the BBQ or pan until golden.
Step 7 – Assemble and Serve
Spread spicy pickle mayo on the bottom buns. Add patties, pickled onions, and your favourite toppings: lettuce, tomato, cheese, mustard, and sliced gherkins.
Make sliders for parties by forming smaller patties and using mini buns.
Storing and Reheating Your Burgers
Store your cooked patties in the fridge for up to 2 days. Reheat burgers in a pan or oven until piping hot. Pickled onions can be kept in a sealed container in the fridge for up to 1 week. The spicy pickle mayonnaise can last in the fridge for up to 2-3 days, if stored in an air-tight container.
Tips
Use 20% fat beef mince for juicer burgers.
Chill patties in the fridge for up to 30 minutes to help them hold their shape on the grill.
Don’t press down too hard during cooking as you will loose all the delicious juices.
Can I make burgers ahead of time?
Yes, you can make the burgers ahead of time by making the patties (beef mince, onion, egg, pepper, Maldon Sea Salt and olive oil) and shape them. You can then store the beef patties in the fridge to chill for up to 3 days, ensuring they are tightly wrapped to prevent oxidation.
Can I freeze the patties?
Yes, you can freeze beef burger patties. Start by shaping the ground beef into patties, adding your desired seasonings to the mix. When freezing, make sure that you separate the patties with parchment paper or plastic wrap to prevent sticking. Use freezer-safe bags or airtight containers to protect from freezer burn. The raw patties can be frozen for up to 3 months. Cooked patties can be frozen for roughly 4 months.
What’s the best beef burger for burgers?
For a juicy and flavour-packed burger, the best beef option is ground chuck. This is because it has an 80/20 lean-to-fat ratio, which means it has a good balance between lean protein and flavourful fat for a delicious, tender and juicy burger. You can also experiment with mixing different cuts like chuck, brisket, or short ribs to create your own burger blend.
Can I cook these without a BBQ?
Yes, you can absolutely cook burgers without a barbecue grill.
Oven Baking – Preheat your oven to 190°C/375°F. Place your patties on a baking sheet and bake for 20-25 minutes for medium-rare, adjusting time for desired doneness.
Pan-Frying – Use a cast iron or non-stick skillet over medium-high heat. Place seasoned patties in the hot skillet, allowing for some space between them. Cooking for about 3-4 minutes per side for a medium-rare burger, flipping halfway for a balanced cook – you want a nicely seared and browned surface on either side.
How do I keep burgers juicy?
If you want your homemade beef burgers to be juicy, you need to make sure to do the following:
Avoid overworking the meat when forming your patties. This will prevent them from becoming tough and dry.
Use a good ground beef with a higher fat content (80/20). This is because it provides a balance of flavour and juiciness from the fat content, which melts during cooking, contributing to a flavourful, juicy burger that’s not too dry.
Add a spoon/knob of butter to add moisture and fat to the beef, helping to prevent the burgers from drying out during the cooking process. It also adds a delicious rich and savoury flavourful that compliments the beef well.
Can you cook beef burgers from frozen
Yes, you can cook beef burgers from frozen. This is because the flat shape of the patties allows for an even cooking. The thawing process can also help retain moisture, leading to a juicer burger! Make sure to adjust your cook time and heat accordingly to ensure the burger is cooker through. For the oven, we recommend cooking at 230°C for 12 minutes, flipping halfway through. If using the air fryer, preheat to 200°C, cooking for 8-12 minutes, flipping halfway through.
Can I cook the beef burgers in an air fryer?
Yes, you can cook homemade beef burgers in the air fryer. Place the patties in the air fryer basket and cook for 5 minutes on one side at 175°C, flip, and cook for another 5 minutes.
Add vibrant colour and irresistible smoky flavour to your next BBQ with these easy smoky grilled peppers. Charred until perfectly tender and finished with a drizzle of red wine vinegar, olive oil, and Maldon Smoked Sea Salt, these grilled peppers are the ultimate summer side dish for picnics, parties, or alfresco dining.
How to Make Smoky Grilled Peppers
Step 1 – Prepare the Peppers
Cut peppers into large pieces, removing pith and seeds.
Step 2 – Grill the Peppers
Preheat BBQ or griddle pan to high.
Place peppers skin side down and grill in batches if needed until nicely charred. Make sure to press peppers gently with tongs to ensure even charring.
Step 3 – Finish and Serve
While still hot, drizzle with red wine vinegar and season with Maldon Smoked Sea Salt.
Finish with olive oil before serving.
Tips
Use a mix of red, yellow, and orange peppers for maximum colour and sweetness.
Grill peppers just before serving for best flavour and texture.
For extra smokiness, close the BBQ lid while grilling for a minute or two. This will add depth to the flavour.
This recipe be made indoors on a griddle pan.
Can I make smoky grilled peppers ahead of time?
Yes, you can make smoky grilled peppers ahead of time. Make sure you prepare your grill or smoker beforehand if barbecuing outdoors. Grill the peppers until the skins are nicely charred and blistered. Once cooled, store in the refrigerator in an airtight container. You can peel the skins off from the grilled peppers if you prefer the taste and texture, especially in dishes like pasta sauces and salads.
How long do grilled peppers last in the fridge?
Grilled peppers can last up to 5-10 days in the fridge if stored in an airtight container. If you want to extend this further, you can freeze them for up to 2 months.
Can I use other types of vinegar?
Yes, you can absolutely use other vinegars instead of red wine vinegar, although the flavour will be slightly different. You can use white wine vinegar, although you won’t get a slightly pink/red hue like red wine vinegar gives. You can also use apple cider vinegar, which has a fruiter flavourful compared to red wine vinegar. Alternatively, sherry vinegar is a slightly sweeter option, which is often used in Spanish cuisine.
Are grilled peppers vegan and gluten-free?
Yes, grilled peppers are both vegan and gluten-free. This is because peppers are naturally plant-based and do not contain any gluten.
Store cooled grilled peppers in an airtight container in the fridge for up to 3 days.
Best served at room temperature—no need to reheat.
Drizzle with extra olive oil to refresh before serving.
If you try these smoky grilled peppers, let us know in the comments! For more BBQ inspiration, explore our summer recipe collection.
Whip up the ultimate avocado toast in minutes Piles high with creamy avocado and a zesty cherry tomato topping, this avocado on toast recipe is fresh, satisfying and finished with a pinch of crunchy Maldon Sea Salt flakes for perfect balance. Ideal for a quick breakfast, healthy brunch or light lunch.
Step 1 – Make the Tomato Topping
In a bowl, mix chopped cherry tomatoes with red wine vinegar, 1 tbsp olive oil, and a pinch of Maldon Sea Salt flakes.
Toss and leave for 5 minutes to lightly macerate; tomatoes should look glossy and juicy.
Step 2 – Toast and Top
Toast the sourdough until golden and crisp.
Fan the avocado slices over each toast. Drizzle with the remaining olive oil.
Season generously with black pepper and Maldon Sea Salt flakes.
Step 3 – Serve
Spoon the tomatoes over the avocado.
Serve immediately while the toast is still crisp.
Tips & FAQs
Tips
Ripeness: Use a ripe Hass avocado that yields slightly to gentle pressure.
Extra zing: Add a squeeze of lemon or lime to the avocado to prevent browning and boost freshness.
Texture swap: Prefer “smashed”? Lightly mash the avocado with a fork before spreading.
Bread: Sourdough gives the best crunch and structure; thick slices hold toppings well.
Finish strong: A final pinch of Maldon Sea Salt flakes enhances sweetness in the tomatoes and balances richness.
FAQs:
What’s the best bread for avocado toast?
Thick-cut sourdough or country bread—sturdy, with an open crumb that toasts crisp without getting soggy.
How do I keep avocado from browning?
Toss sliced or smashed avocado with 1–2 tsp lemon or lime juice and cover tightly until serving.
Can I make this ahead?
Assemble just before serving for crisp toast. Prep the tomato topping up to 24 hours ahead; store chilled in an airtight container.
Is avocado toast vegan?
Yes—this recipe is naturally vegan. Add-ons like poached eggs or feta make it vegetarian, not vegan.
Serving Suggestions
Add-ons: chilli flakes, basil, chives, or a drizzle of balsamic glaze.
Protein boosts: poached egg, smoked salmon, or marinated chickpeas (keep base recipe vegan).
Plate with a simple green salad or fruit for brunch.
Portioning: serve as two open-faced toasts or cut into halves/quarters for canapés.
Storage & Reheating
Best enjoyed fresh.
Tomato topping: refrigerate up to 24 hours.
Avocado: prep to order; if prepping, coat with citrus and press cling film directly on the surface.
Toast: toast just before serving; reheating softens the crumb.